
Table of Contents
- Requirements
- Install Java JDK and JRE
- Install Apache Tomcat or Apache TomEE
- Install MySQL Community Edition
- Install IntelliJ IDEA and create a project
- Convert Eclipse Project to IntelliJ Project
Requirements
Install Java JDK and JRE
Go to the website provided at the top of the document and choose which version of Java you prefer ( in this guide we will use Java 15).
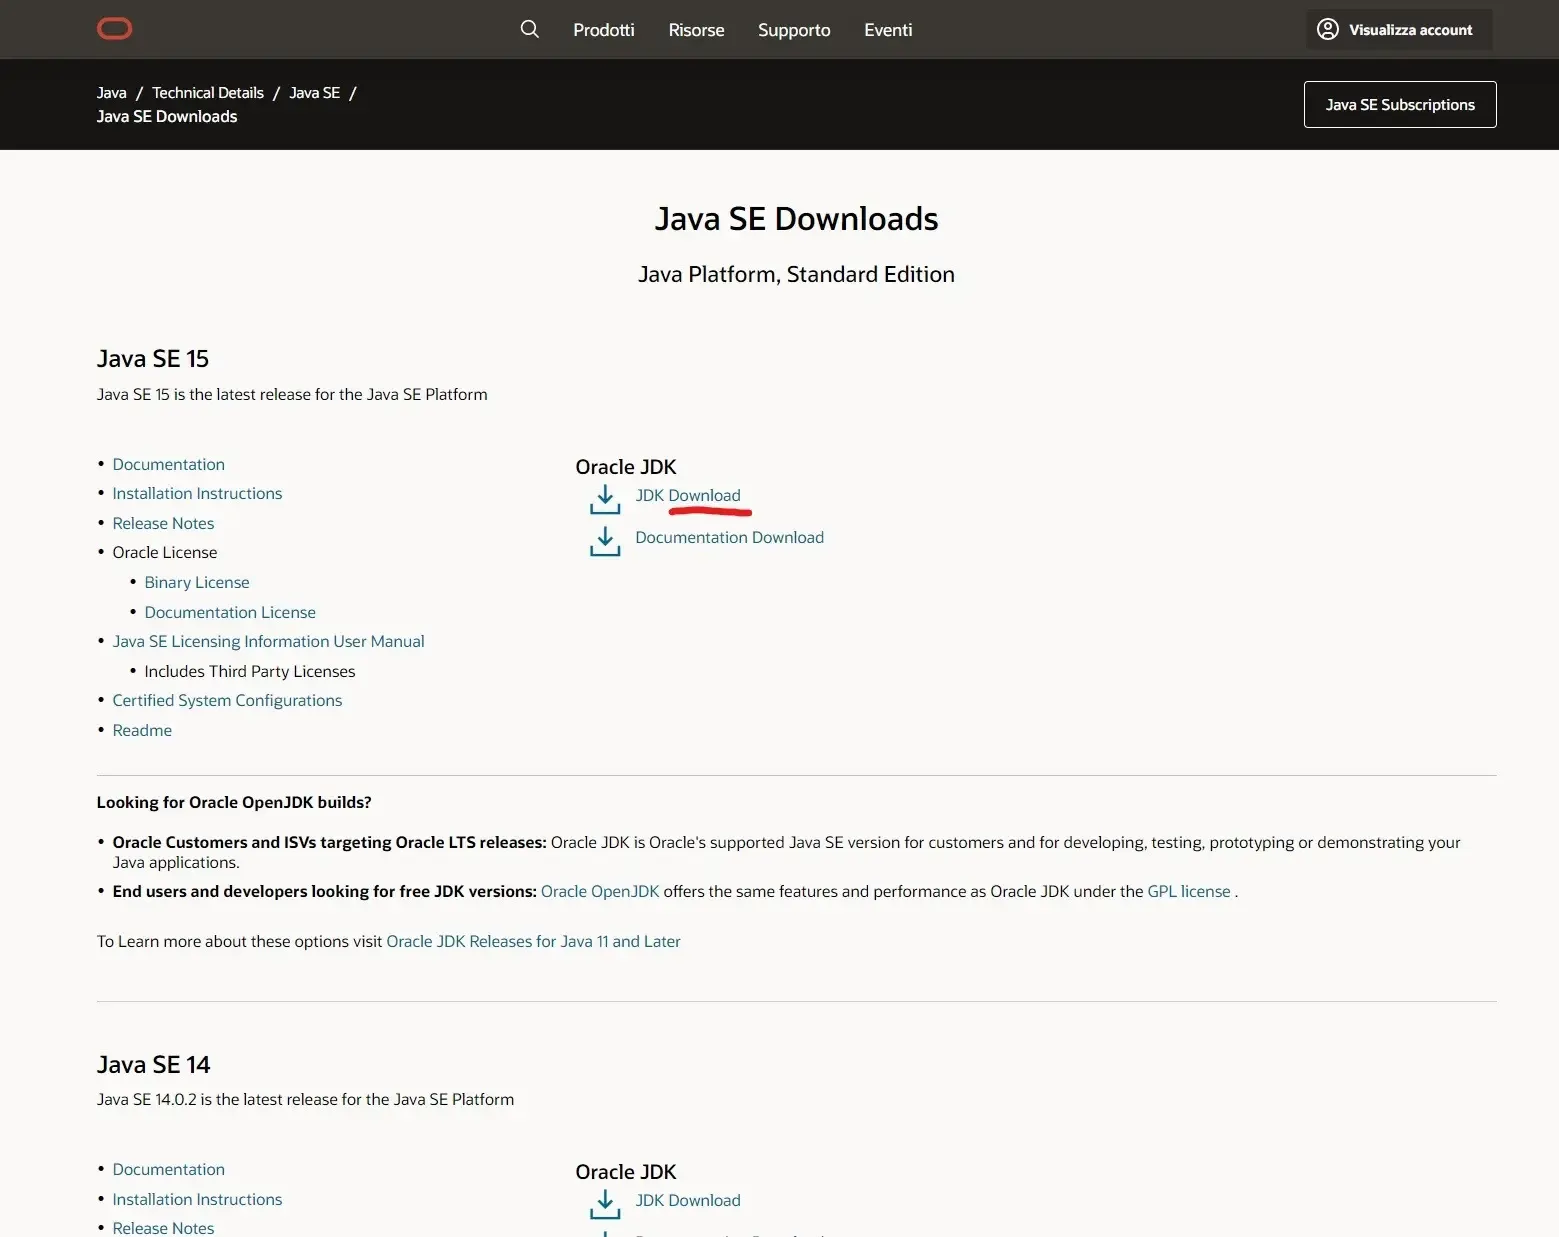
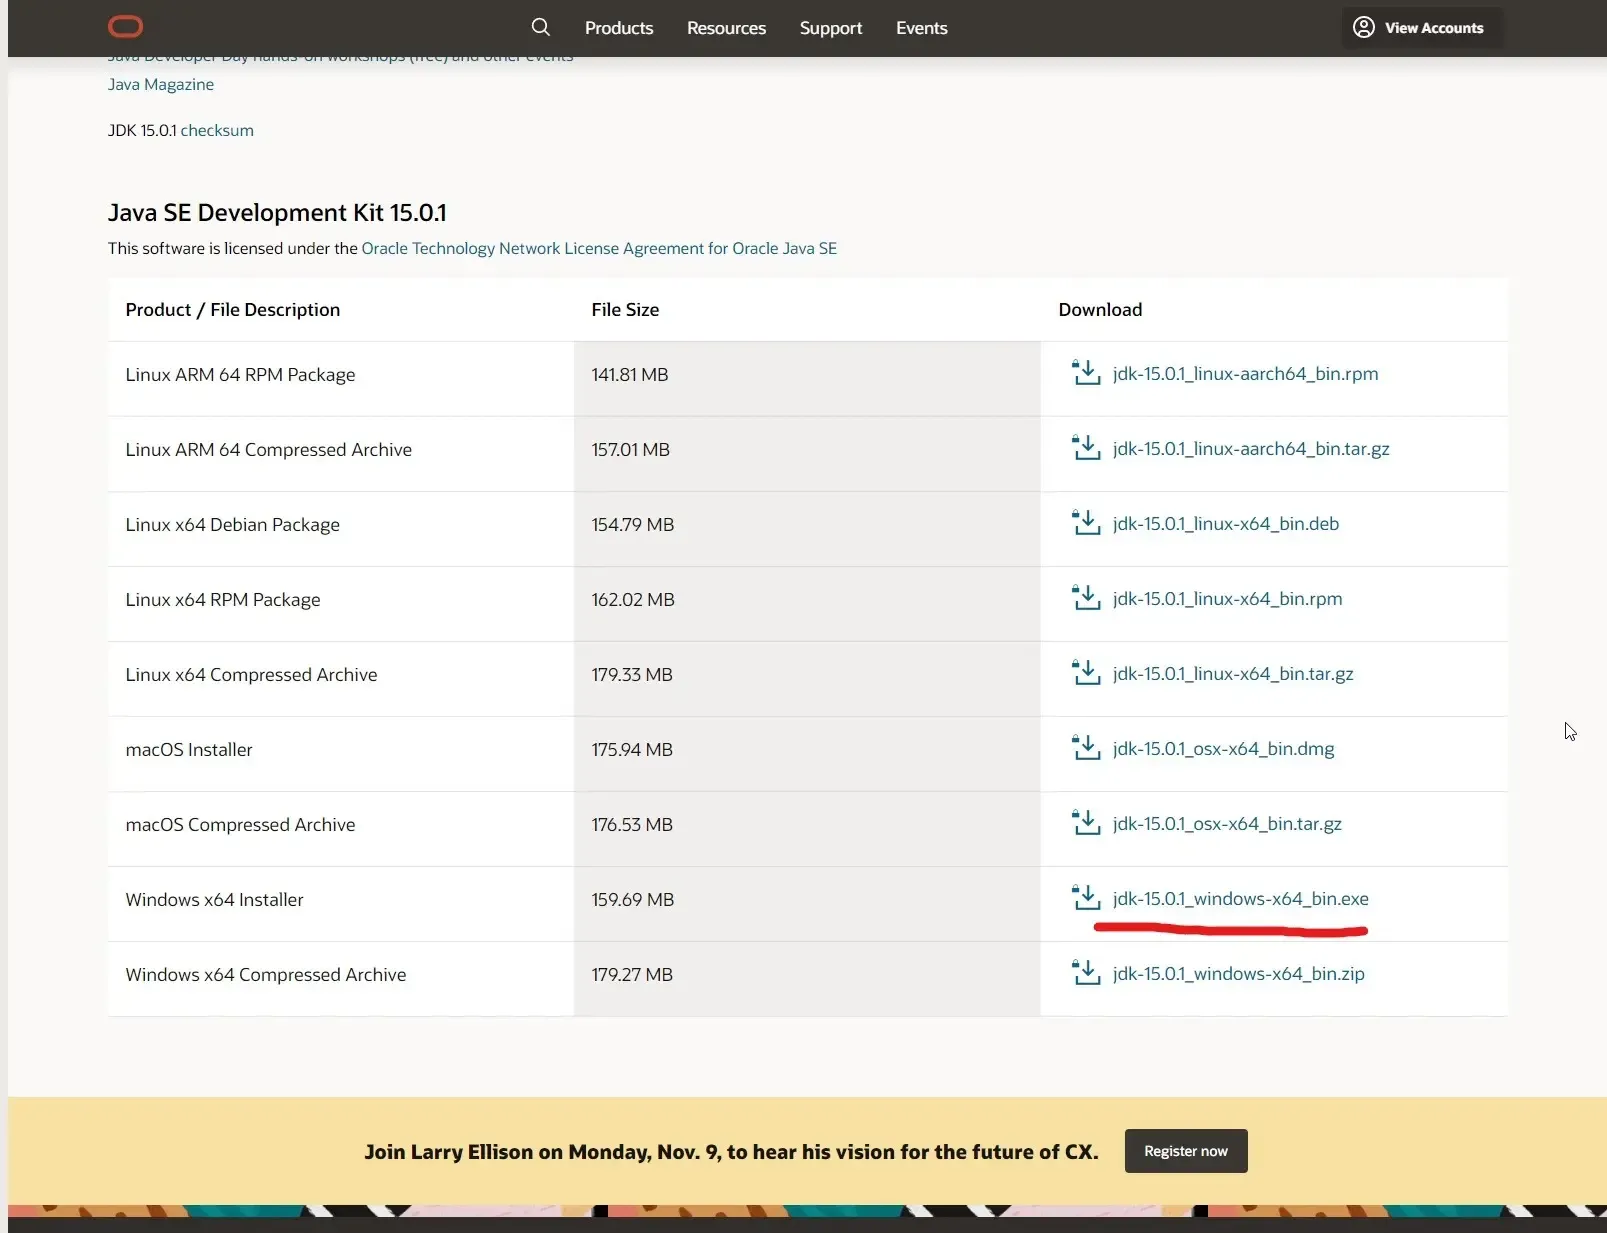
Download based on your OS, in this case Windows.
If you have downloaded the installer and followed its steps, Java should already be in your PATH.
Open CMD/iTerm/Linux terminal and check if everything is correct, if you type java -version you
should see a similar output.
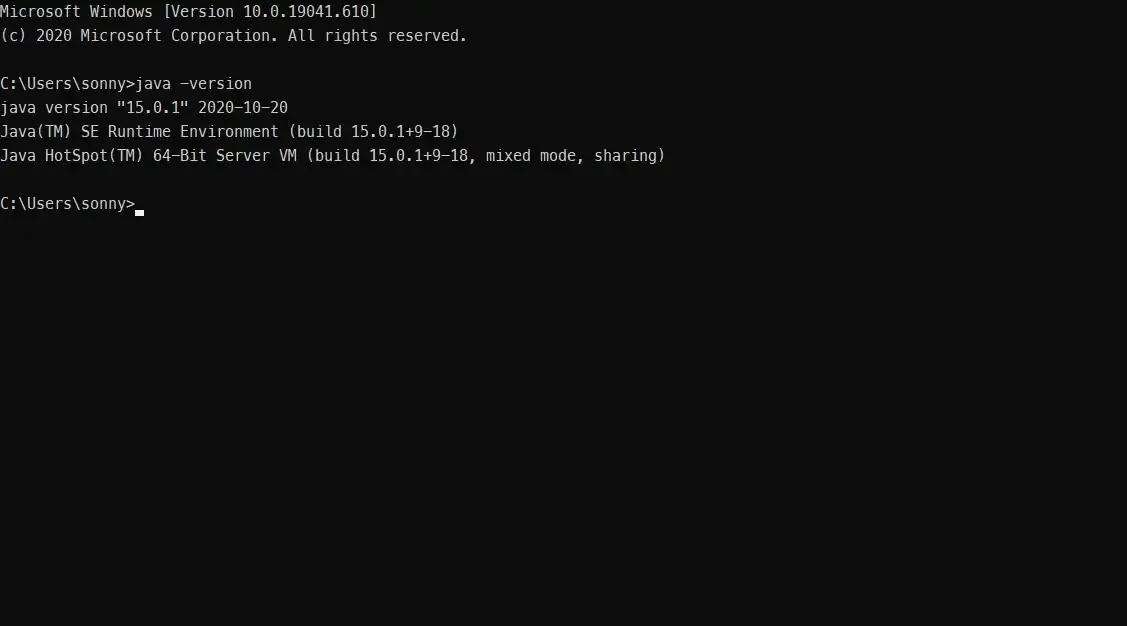
If java isn’t a recognized command follow the steps below otherwise go to the next step.
Windows
Go to Start>Edit the system environment variables then click on Environment Variables, in the
section User section variables for [your username] click on Path and Edit.
Click on Browse and navigate to the Java installation folder (something
like path\to\java\jdk.version\bin) then exit and try checking the version into a new CMD
window.
Linux/Mac
Open your terminal type nano ~/.bashrc on Linux or nano ~/.bash_profile on MacOS, add
the following line export PATH=$PATH:/path/to/java/bin, save and restart terminal to check the
version.
Install Apache Tomcat or Apache TomEE
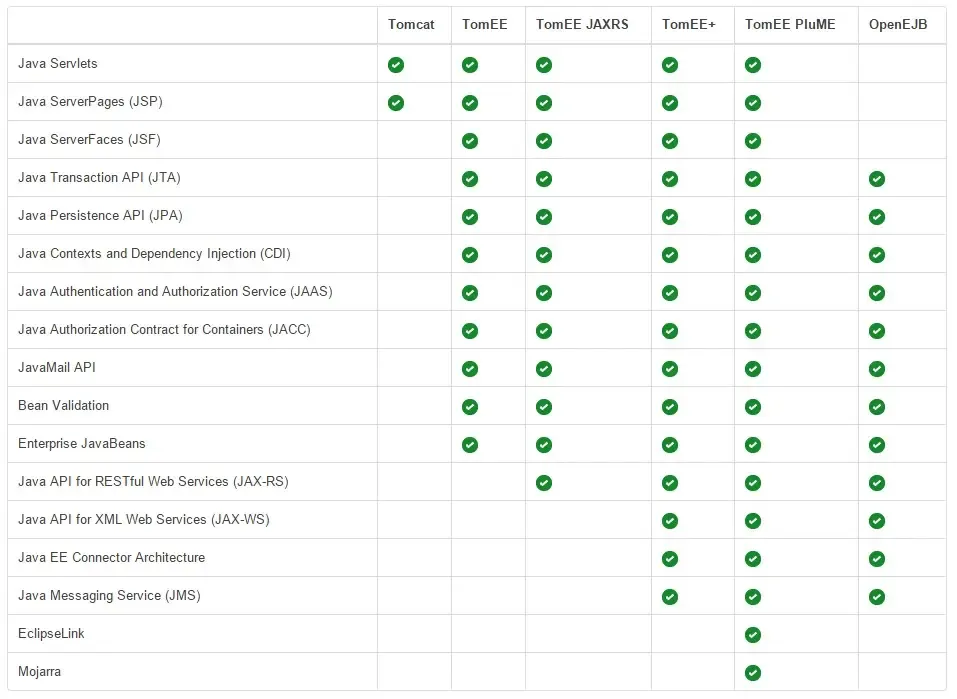
Decide which application server you need based on what project you are creating:
Install Tomcat
Go to the link provided and download based on you OS; for Windows use the installer, for ** MacOS/Linux** use the tar.gz.
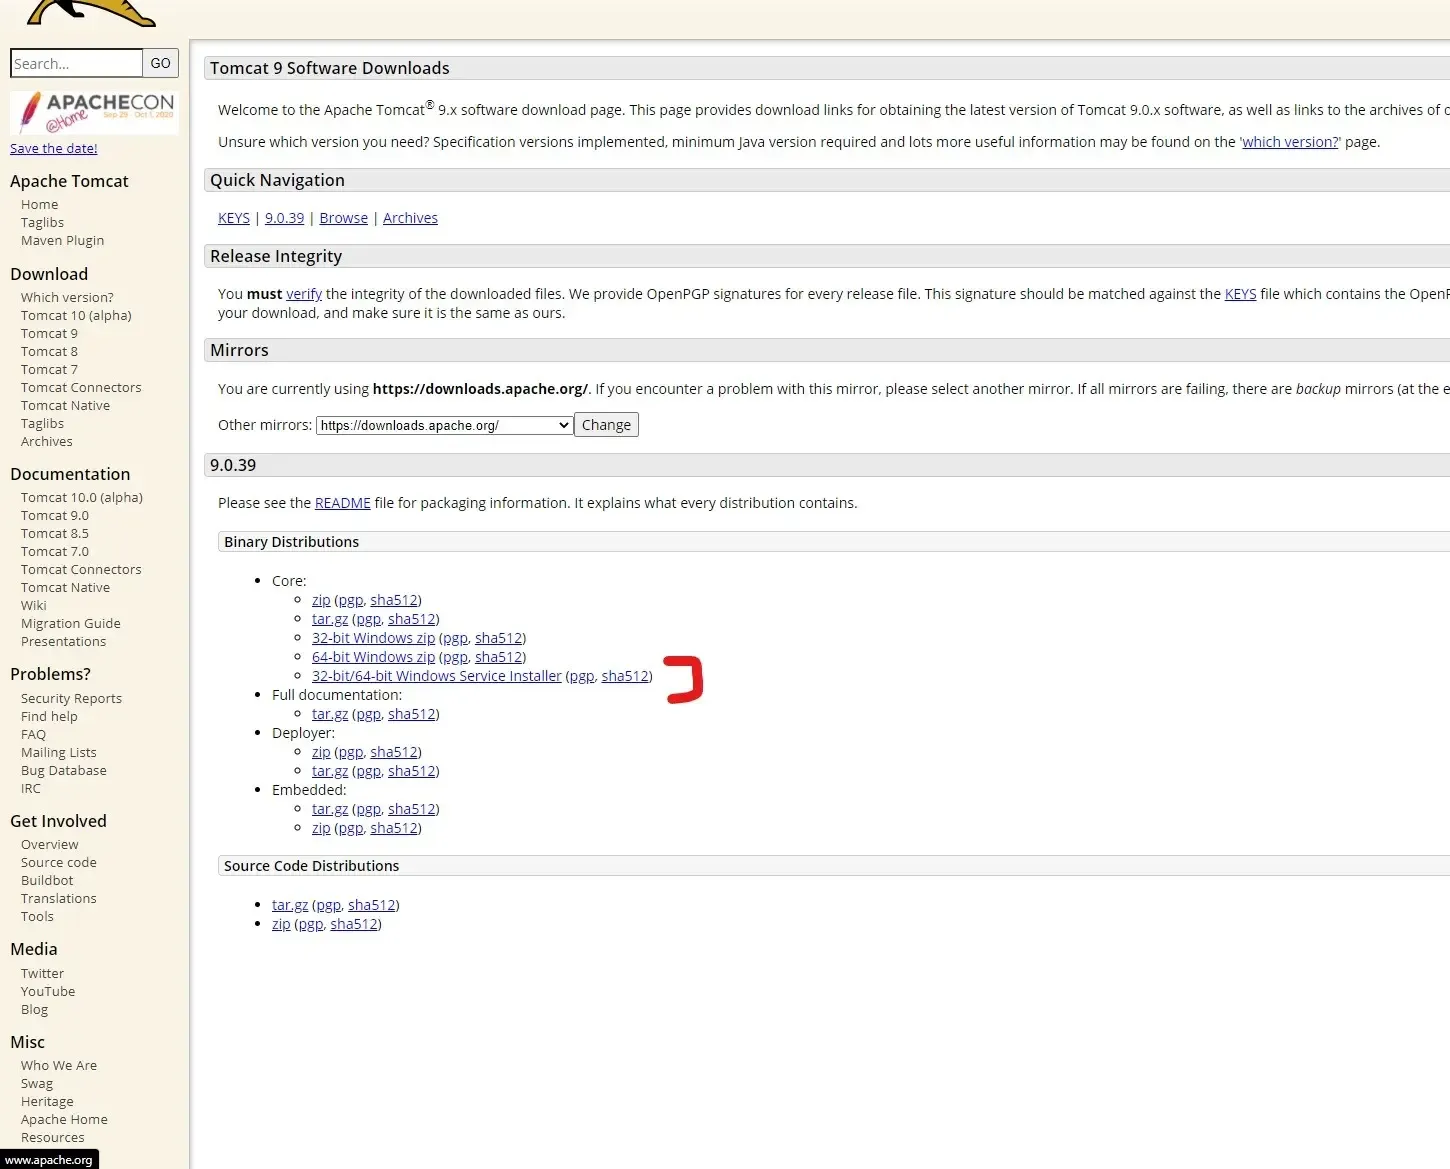
The installer automatically installs and runs Apache Service at startup; the tar.gz needs to be
extracted and placed whenever you want and needs to be started manually by accessing the
installation folder through terminal with cd path/to/installation/folder and running ./startup.
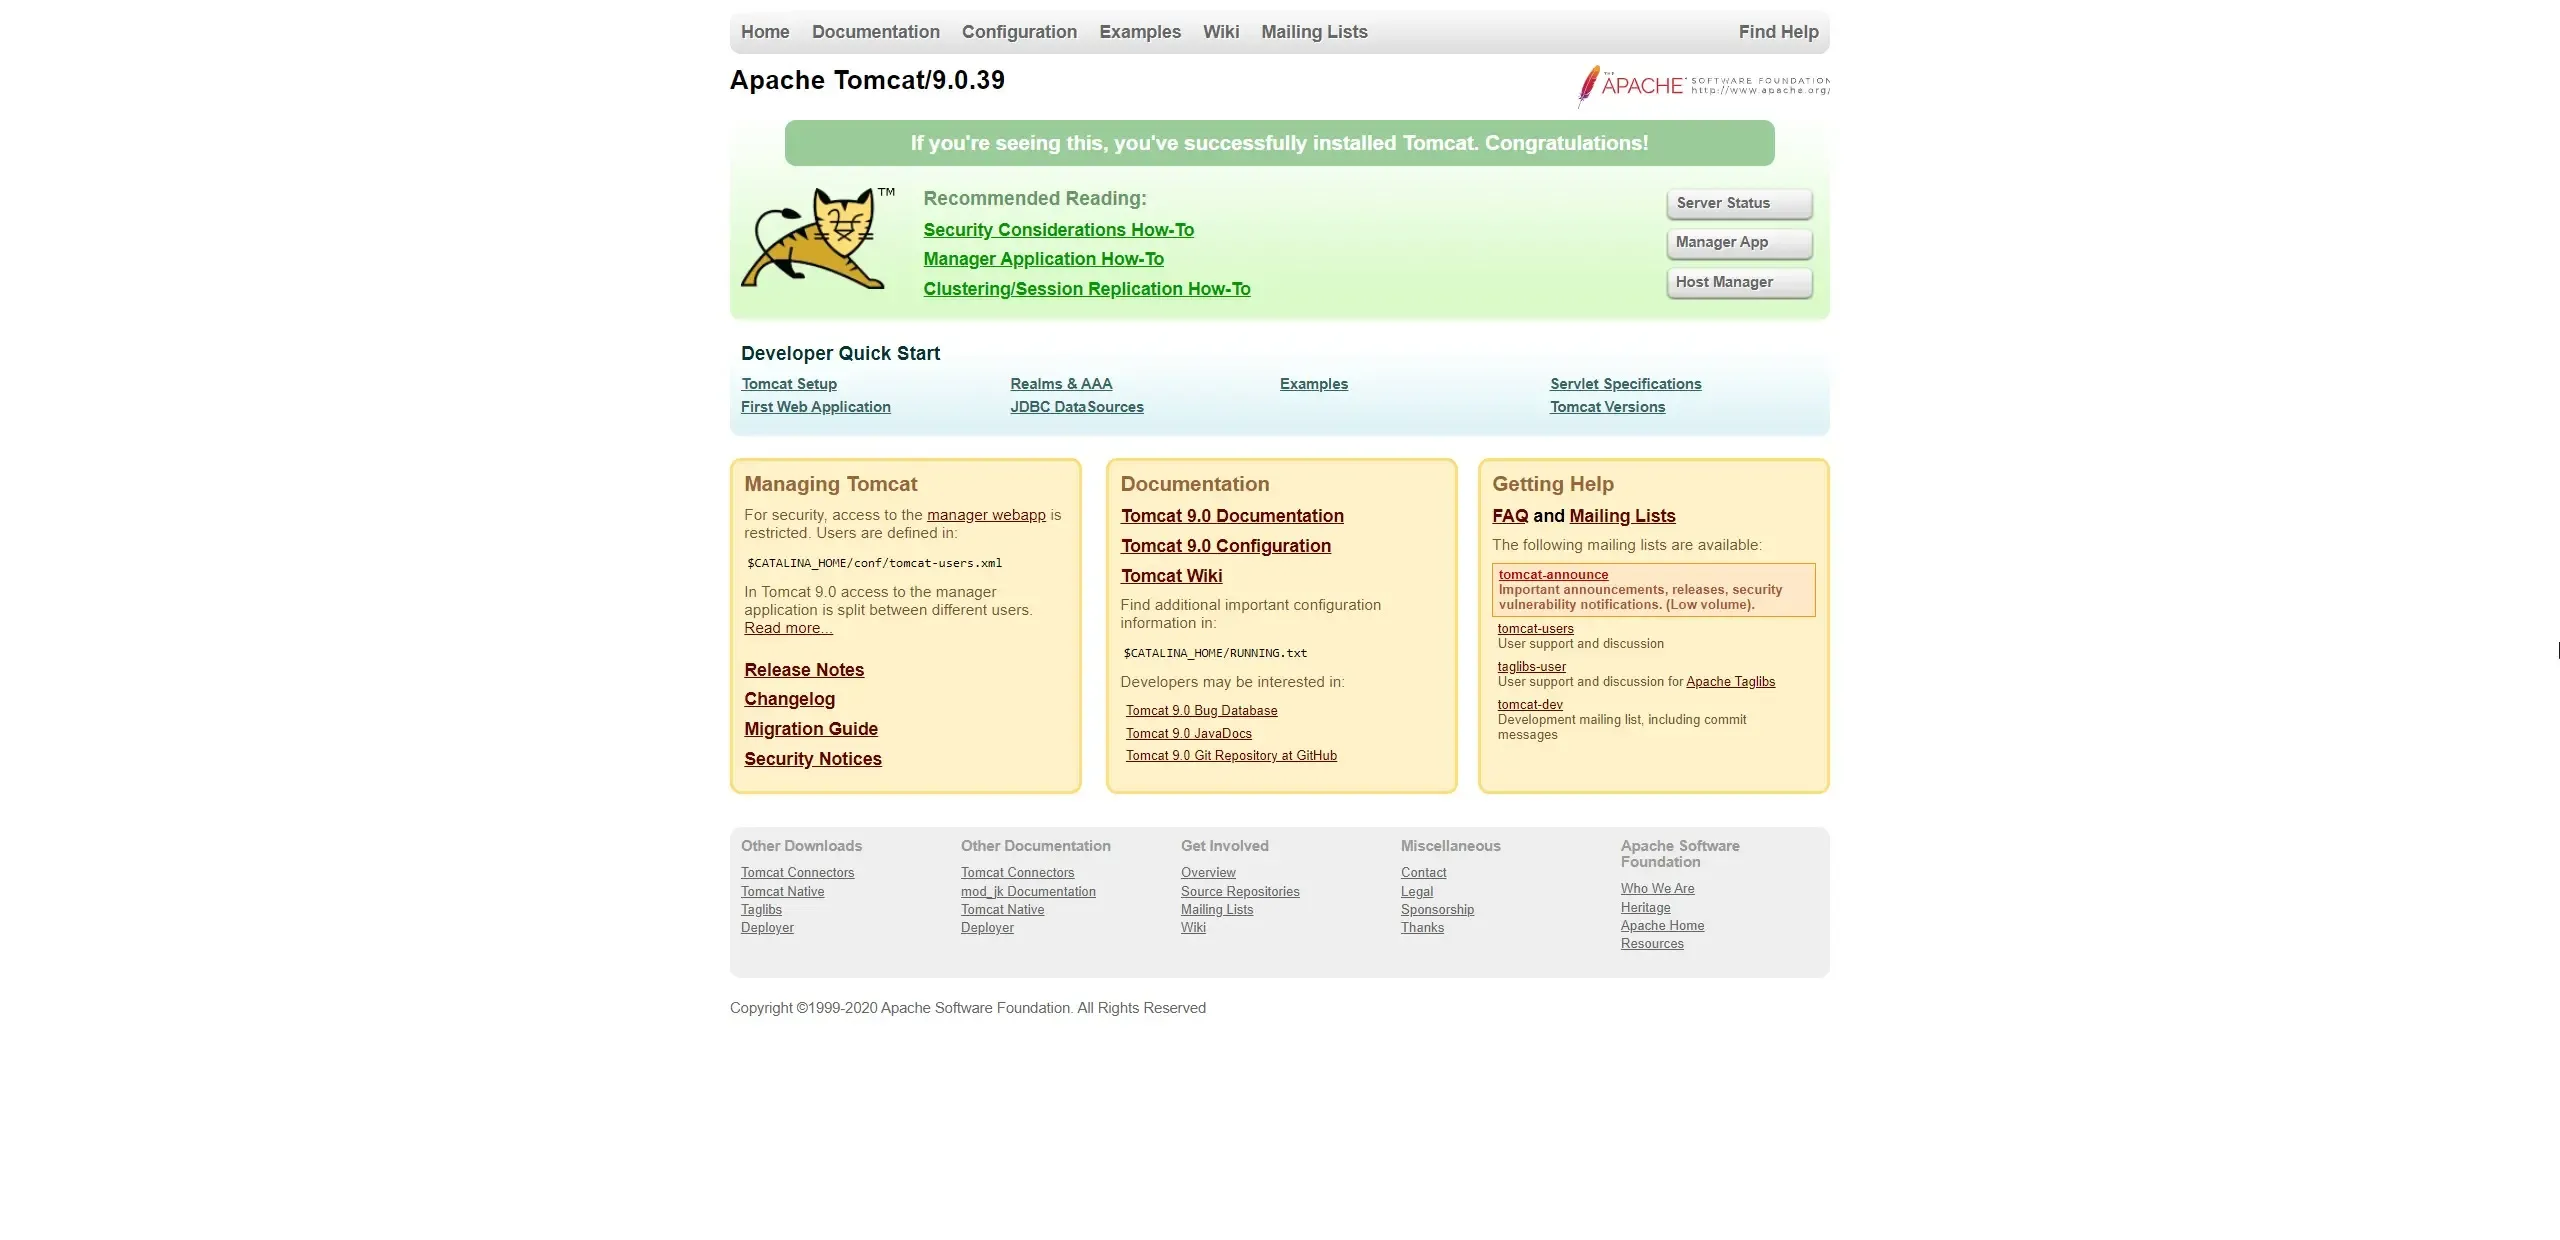
To check if Tomcat is installed correctly, go to Start>Monitor Tomcat>Service Status>Start on
Windows or run folder/to/tomcat/./startup on Linux/MacOS and then navigate
to http://localhost:8080 and you should see a page like this.
Next navigate to path/to/your/tomcat/installation/Tomcat{whatever_version}/conf and edit server.xml and
replace this two fields with this: <Server port="8005" shutdown="SHUTDOWN">.
Install TomEE
Download TomEE archive here.
Extract and place the folder in your preferred workspace and test the server by
running path/to/tomee/bin/TomEE.exe on Windows and path/to/tomee/bin/startup.sh on MacOS/Linux.
Install MySQL Community Edition
Reach the website and download the installer; on the first tab select Developer Default,
on Check requirements tab click on Execute, proceed until Accounts and Roles and set the
database password.
Proceed until MySQL Installer shows the server installation on Connect to the server,
insert root and previous password and select Check.
Install IntelliJ IDEA and create a project
If you don’t have it create a Jetbrains account then download IntelliJ IDEA Ultimate for your OS.
Create a JakartaEE project
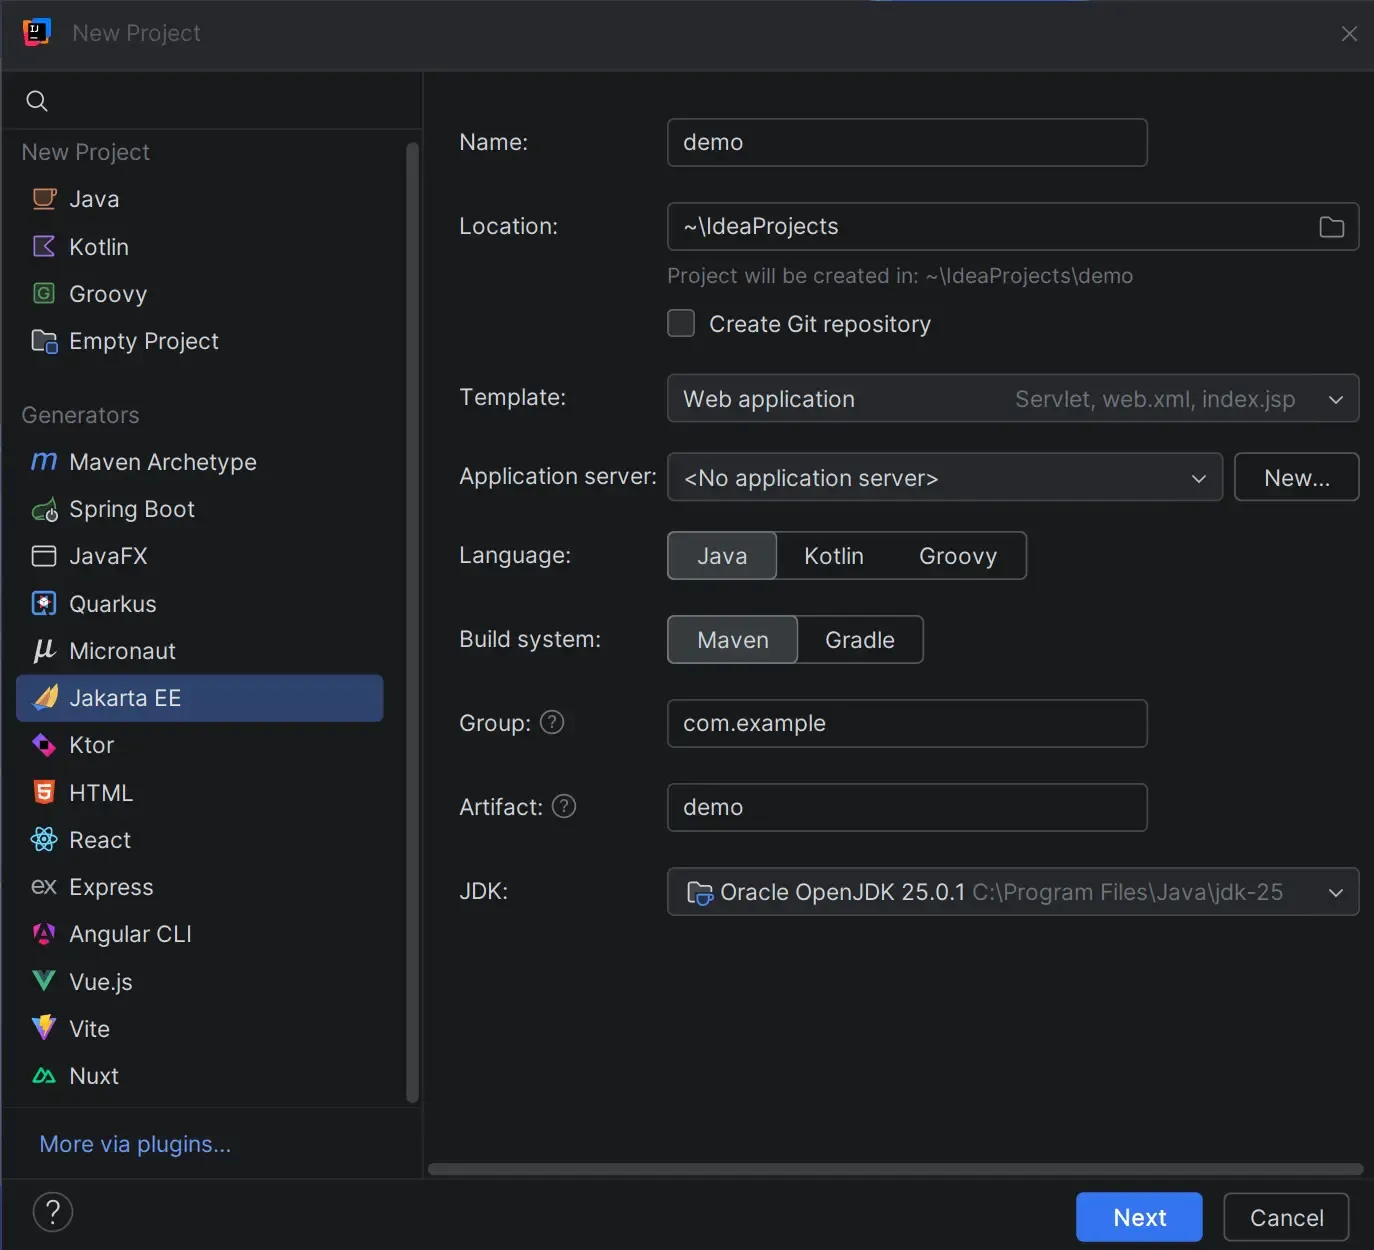
Open IntelliJ and select New Project, then select JakartaEE tab and Template Web application
drop down menu, on detected JDKs, select the one you previously downloaded.
Create a new Application server and select Tomcat/TomEE path:
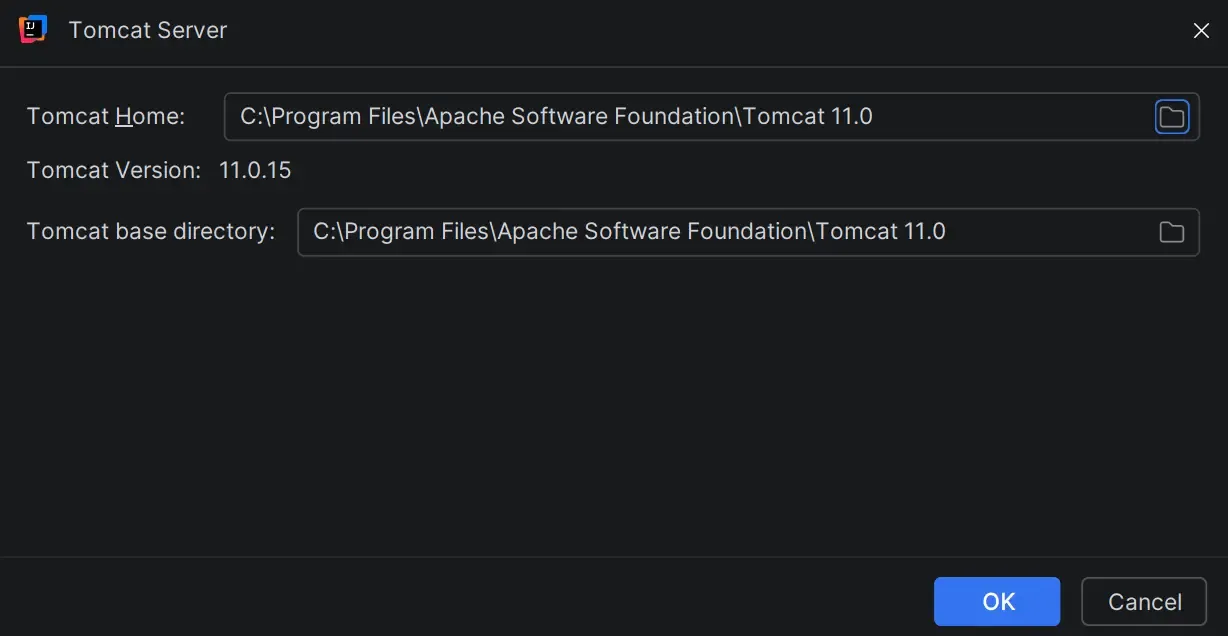
Click on Next, select Web Profile under Specifications and create the project.
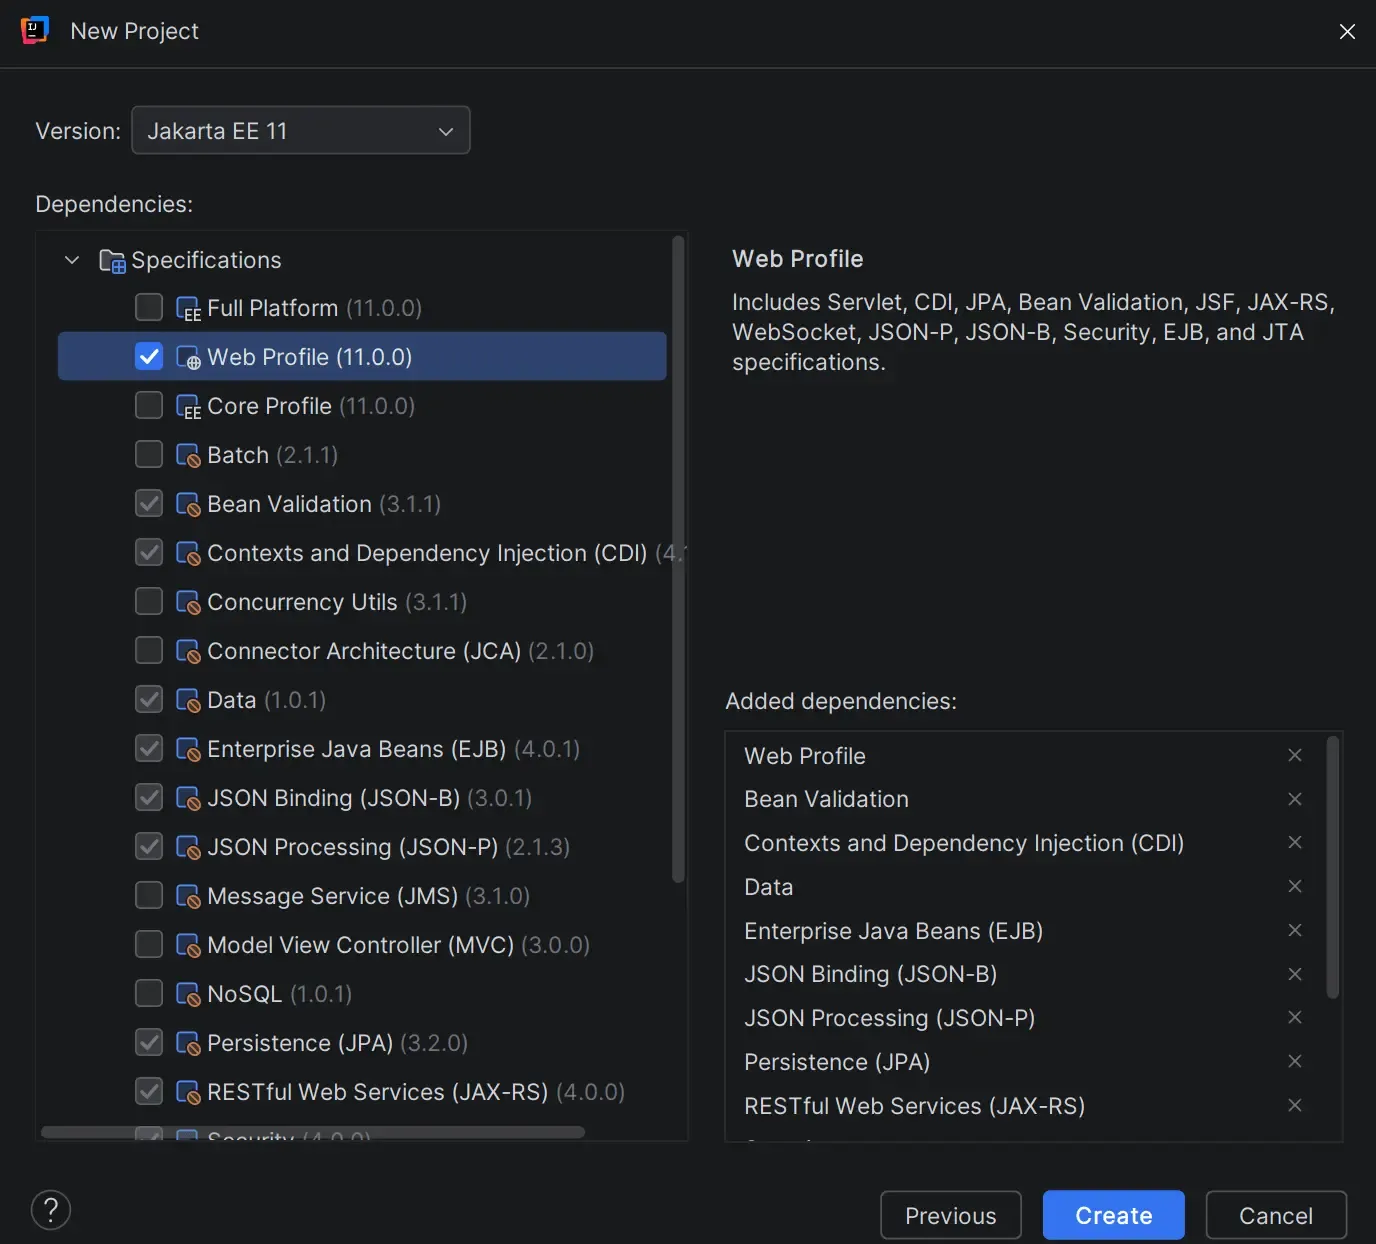
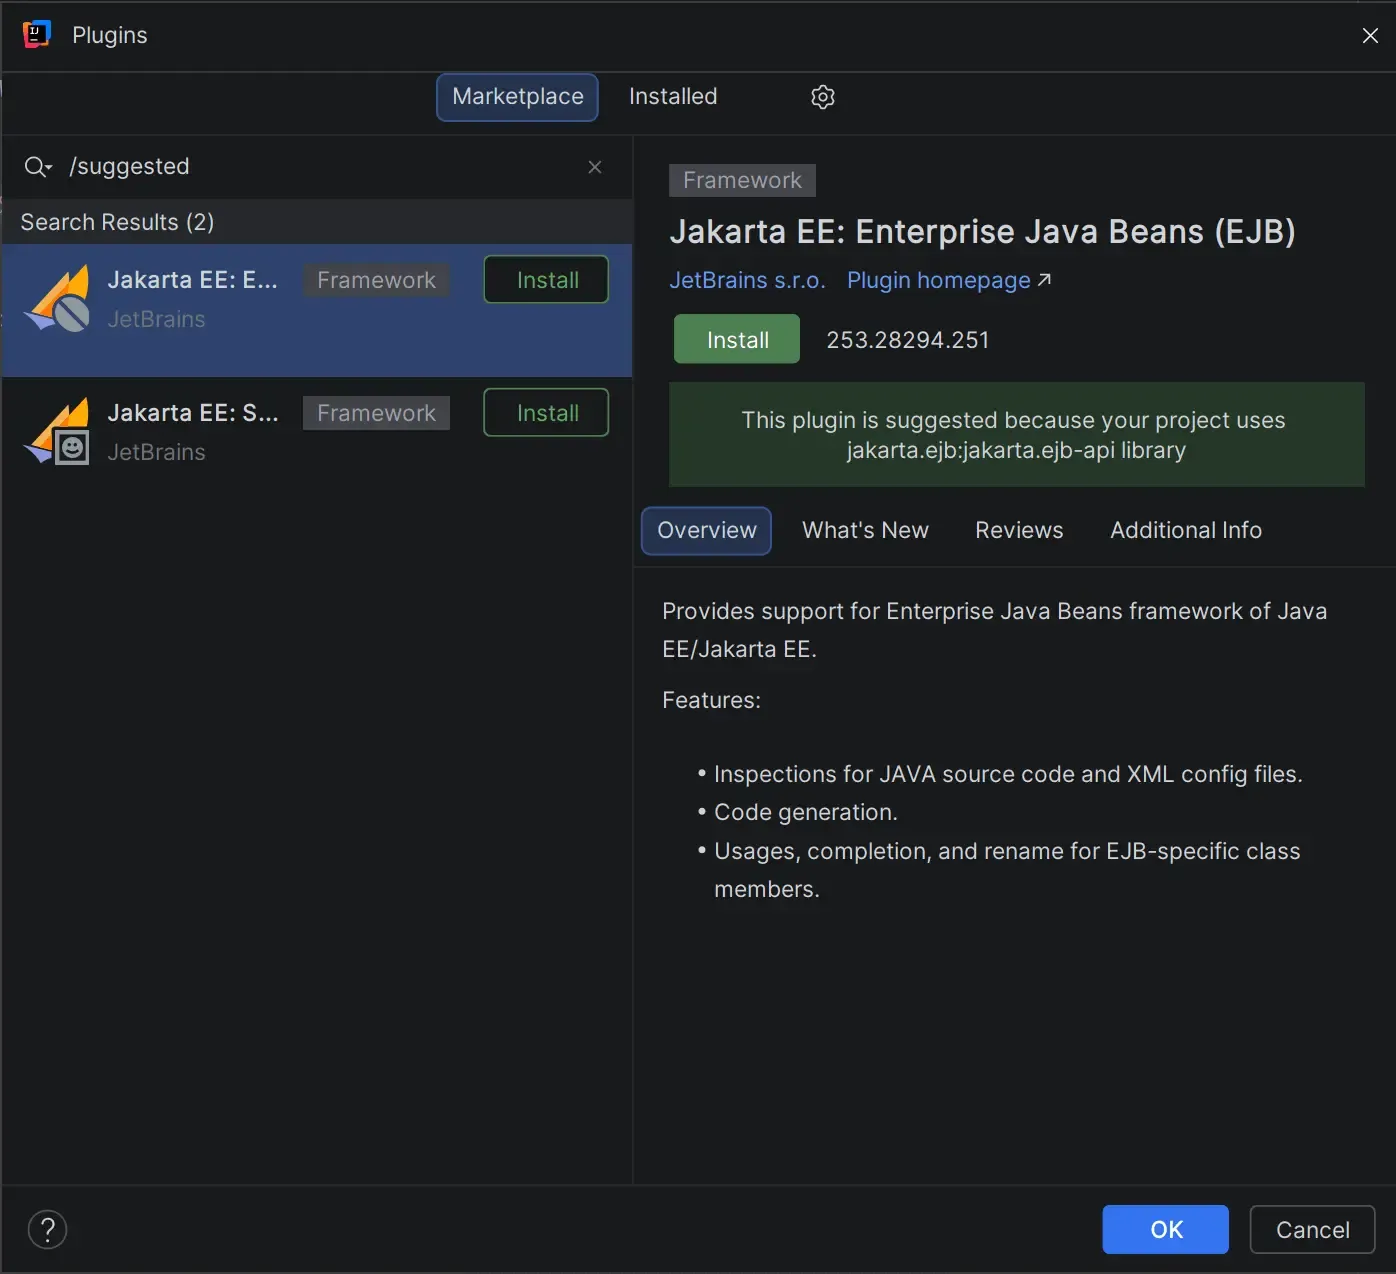
IntelliJ might prompt you with some suggested plugins to install, I suggest to add them to your IDE
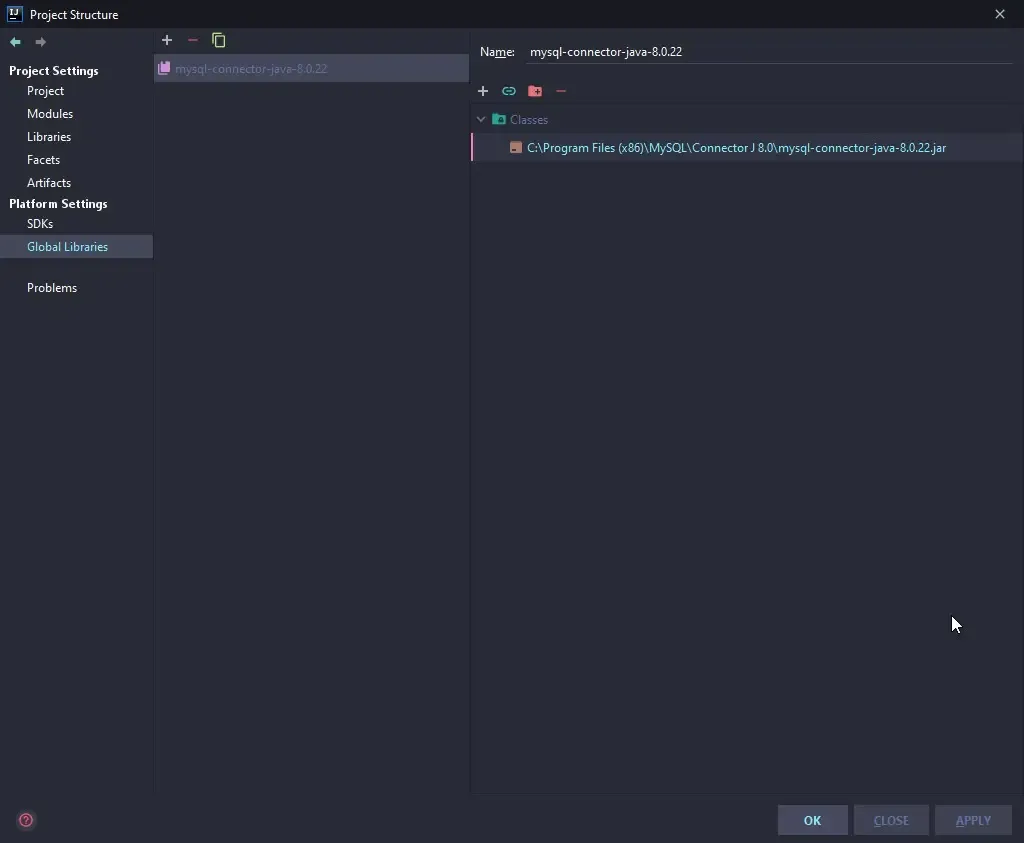
Add Java MySQL Connector
After the creation go to File>Project Structure>Platform Settings>Global Libraries and select +>Java, navigate to the
installation folder of the connector chosen during the MySQL Community Edition installation (on
Windows is C:\Program Files (x86)\MySQL\Connector J 8.0\mysql-connector-java-8.0.22.jar)
Setup Tomcat/TomEE Server
With newer Intellij versions the configuration is automatically created once your project is fully loaded, so you might wanna skip this step
Close this window, go to the top right and click on Add configuration; on the new window opened
press + and select Tomcat Server>Local or TomEE Server>Local for TomEE.
Choose the server name you like and then select Application Server>Configure and choose your
Tomcat/TomEE installation directory.

Save and then in the bottom right select 💡Fix, on the Artifacts tab select +,
choose Web Application Exploded, name it and double click all Available Elements.
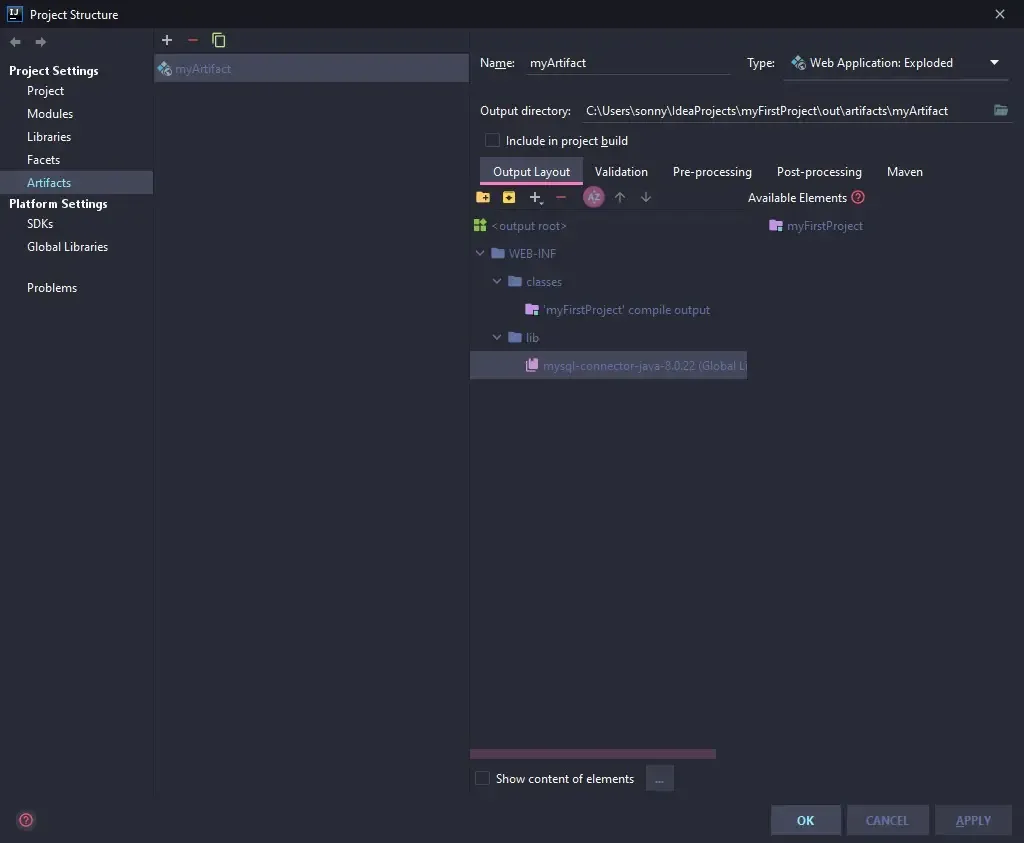
Apply and exit.
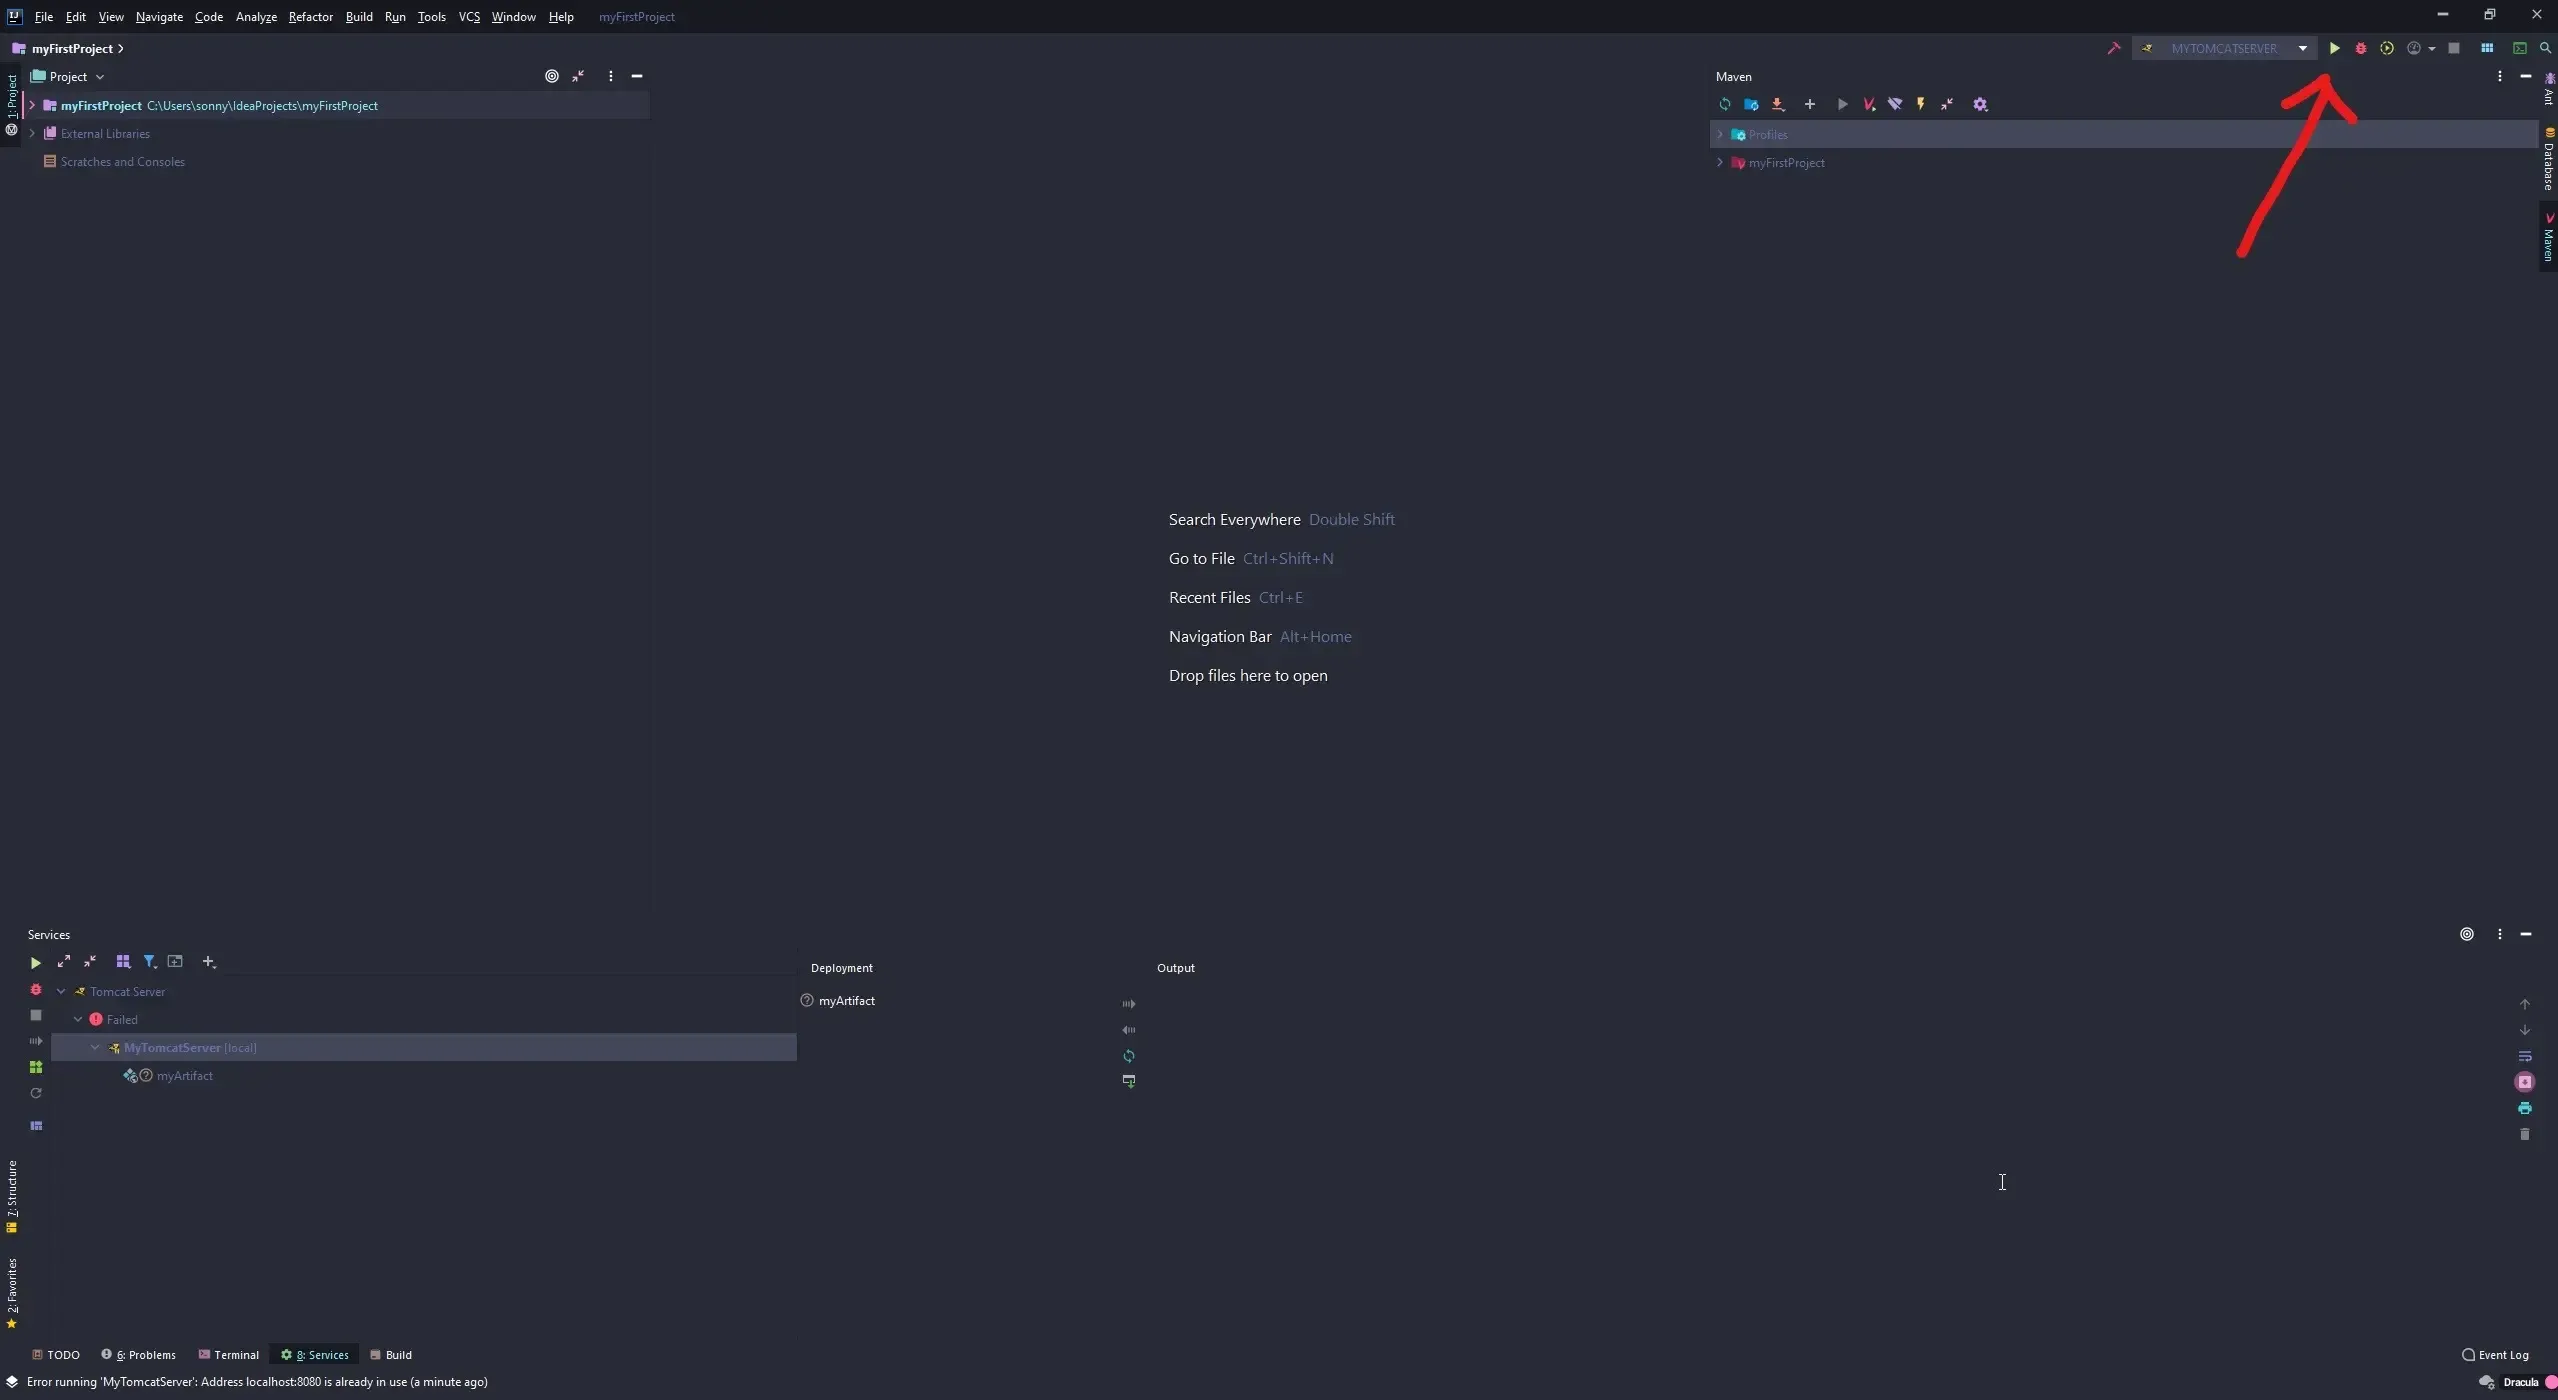
Test the newly created configuration by killing every Tomcat Server already running and click in the
top right corner Run.
Setup pom.xml and multi-modules
IntelliJ manages projects’ dependencies in pom.xml, you need to add in
the <dependencies></dependencies> all the dependencies required by your project.
If you wish to had more dependency navigate to https://mvnrepository.com/, search the one you need
and add it to the pom.xml file. A simple and yet complete with all JakartaEE dependencies with EJB
and JPA support example can be seen below:
<project xmlns="http://maven.apache.org/POM/4.0.0" xmlns:xsi="http://www.w3.org/2001/XMLSchema-instance" xsi:schemaLocation="http://maven.apache.org/POM/4.0.0 https://maven.apache.org/xsd/maven-4.0.0.xsd">
<modelVersion>4.0.0</modelVersion>
<groupId>MissionExpensesWeb</groupId>
<artifactId>MissionExpensesWeb</artifactId>
<version>0.0.1-SNAPSHOT</version>
<packaging>war</packaging>
<dependencies>
<!-- https://mvnrepository.com/artifact/org.apache.maven.plugins/maven-compiler-plugin -->
<dependency>
<groupId>org.apache.maven.plugins</groupId>
<artifactId>maven-compiler-plugin</artifactId>
<version>3.8.1</version>
<scope>provided</scope>
</dependency>
<!-- https://mvnrepository.com/artifact/org.apache.maven.plugins/maven-war-plugin -->
<dependency>
<groupId>org.apache.maven.plugins</groupId>
<artifactId>maven-war-plugin</artifactId>
<version>3.3.1</version>
<scope>provided</scope>
</dependency>
<!-- https://mvnrepository.com/artifact/org.apache.commons/commons-lang3 -->
<dependency>
<groupId>org.apache.commons</groupId>
<artifactId>commons-lang3</artifactId>
<version>3.11</version>
<scope>provided</scope>
</dependency>
<!-- https://mvnrepository.com/artifact/javax.servlet/javax.servlet-api -->
<dependency>
<groupId>javax.servlet</groupId>
<artifactId>javax.servlet-api</artifactId>
<version>4.0.1</version>
<scope>provided</scope>
</dependency>
<!-- https://mvnrepository.com/artifact/jakarta.persistence/jakarta.persistence-api -->
<dependency>
<groupId>jakarta.persistence</groupId>
<artifactId>jakarta.persistence-api</artifactId>
<version>3.0.0</version>
</dependency>
<!-- https://mvnrepository.com/artifact/org.thymeleaf/thymeleaf -->
<dependency>
<groupId>org.thymeleaf</groupId>
<artifactId>thymeleaf</artifactId>
<version>3.0.11.RELEASE</version>
<scope>provided</scope>
</dependency>
<!-- https://mvnrepository.com/artifact/jakarta.ejb/jakarta.ejb-api -->
<dependency>
<groupId>jakarta.ejb</groupId>
<artifactId>jakarta.ejb-api</artifactId>
<version>4.0.0-RC2</version>
</dependency>
<!-- https://mvnrepository.com/artifact/org.apache.tomcat/tomcat-catalina -->
</dependencies>
<build>
<sourceDirectory>src</sourceDirectory>
<plugins>
<plugin>
<artifactId>maven-compiler-plugin</artifactId>
<version>3.8.1</version>
<configuration>
<release>15</release>
</configuration>
</plugin>
<plugin>
<artifactId>maven-war-plugin</artifactId>
<version>3.3.1</version>
<configuration>
<warSourceDirectory>WebContent</warSourceDirectory>
</configuration>
</plugin>
</plugins>
</build>
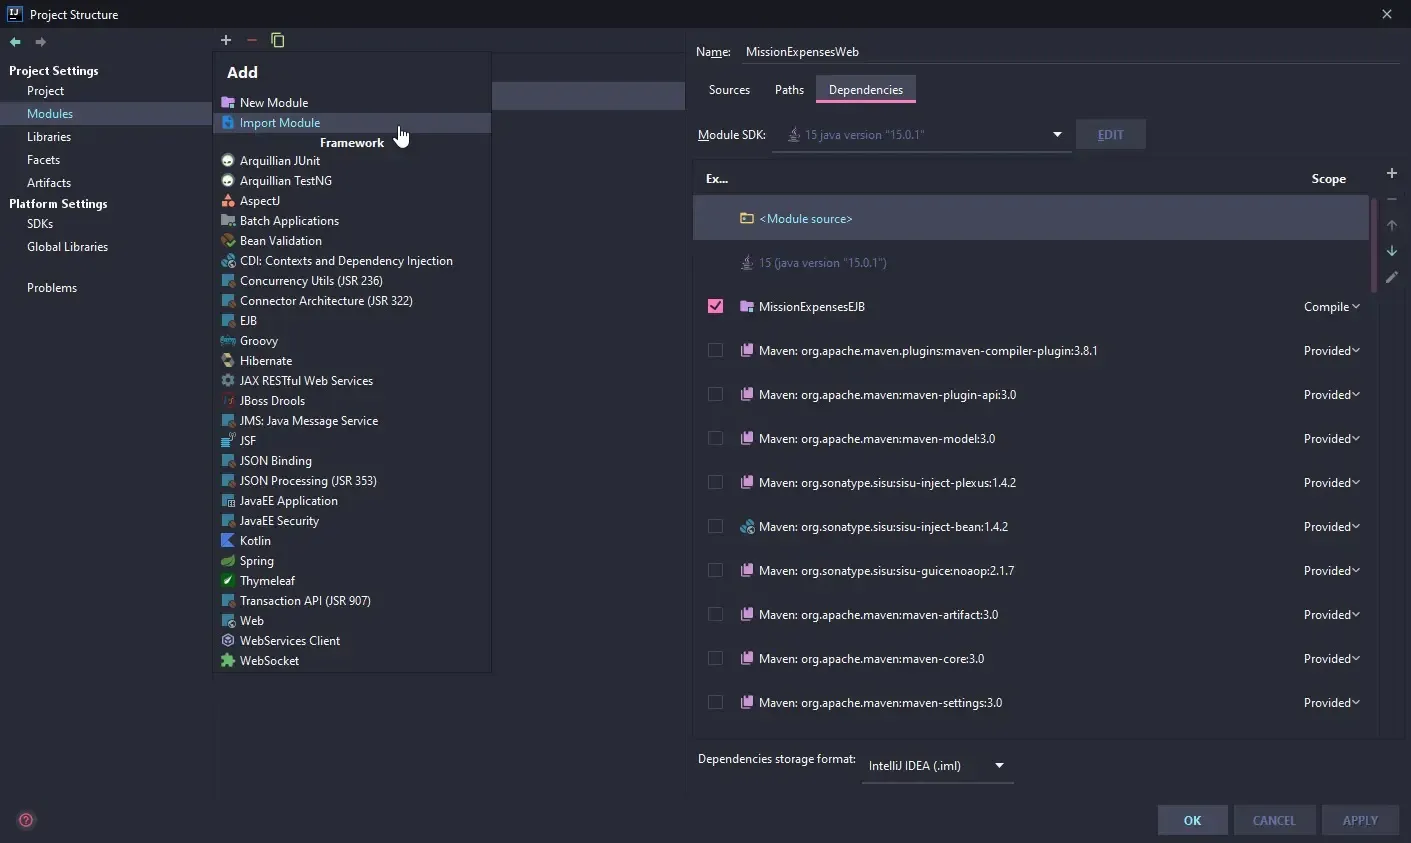
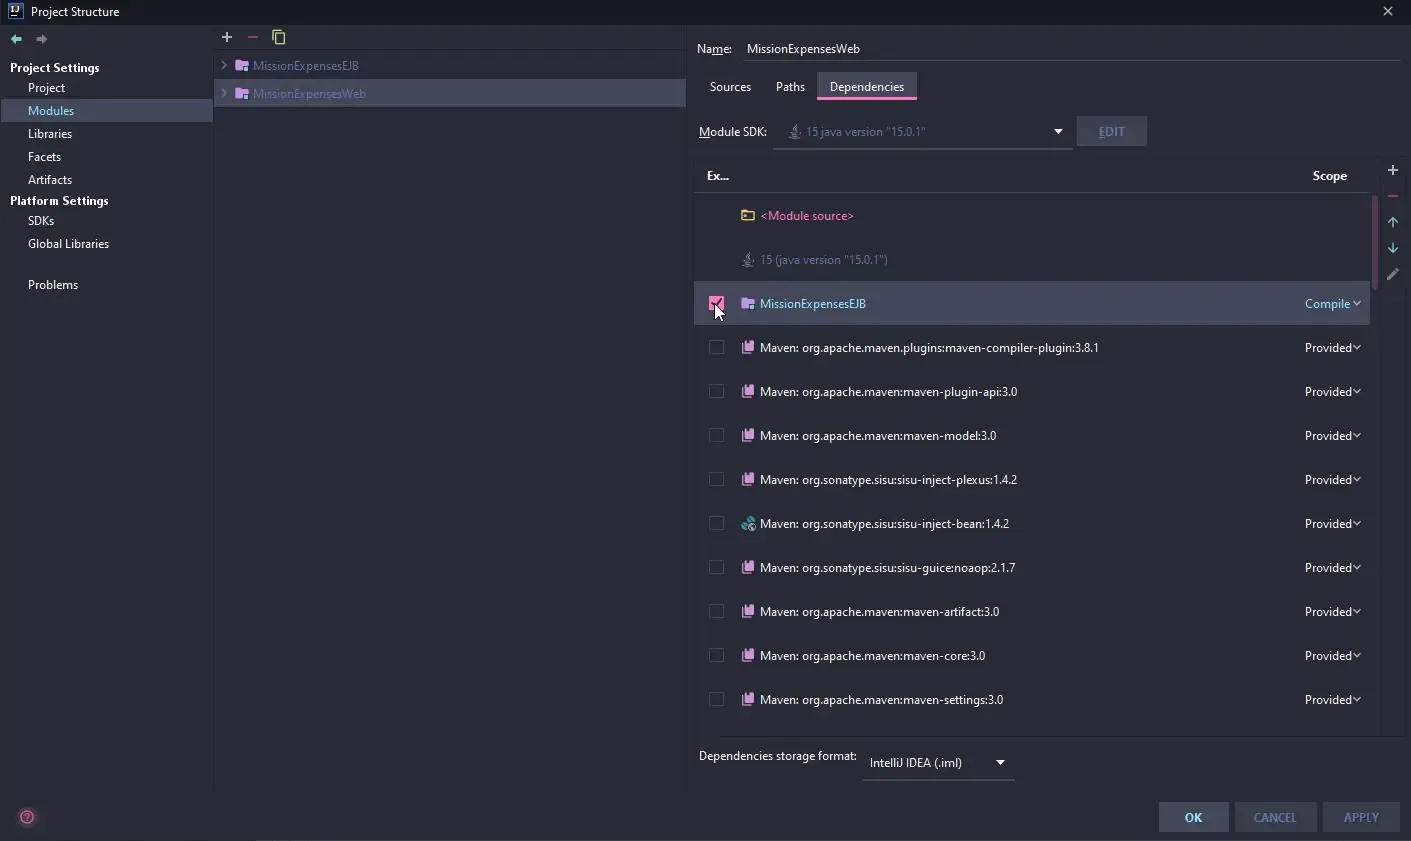
</project>If you are creating or importing a multi-modules project (like Eclipse workspace), you need to specify module dependencies if you are using classes from another module.
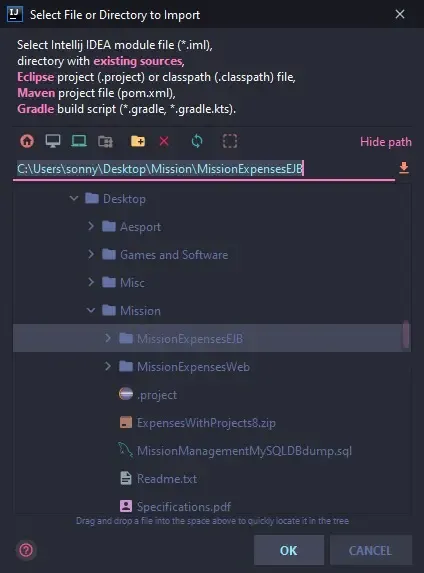
This can be achieved by navigating to File>Project Structure>Modules and by adding your desired
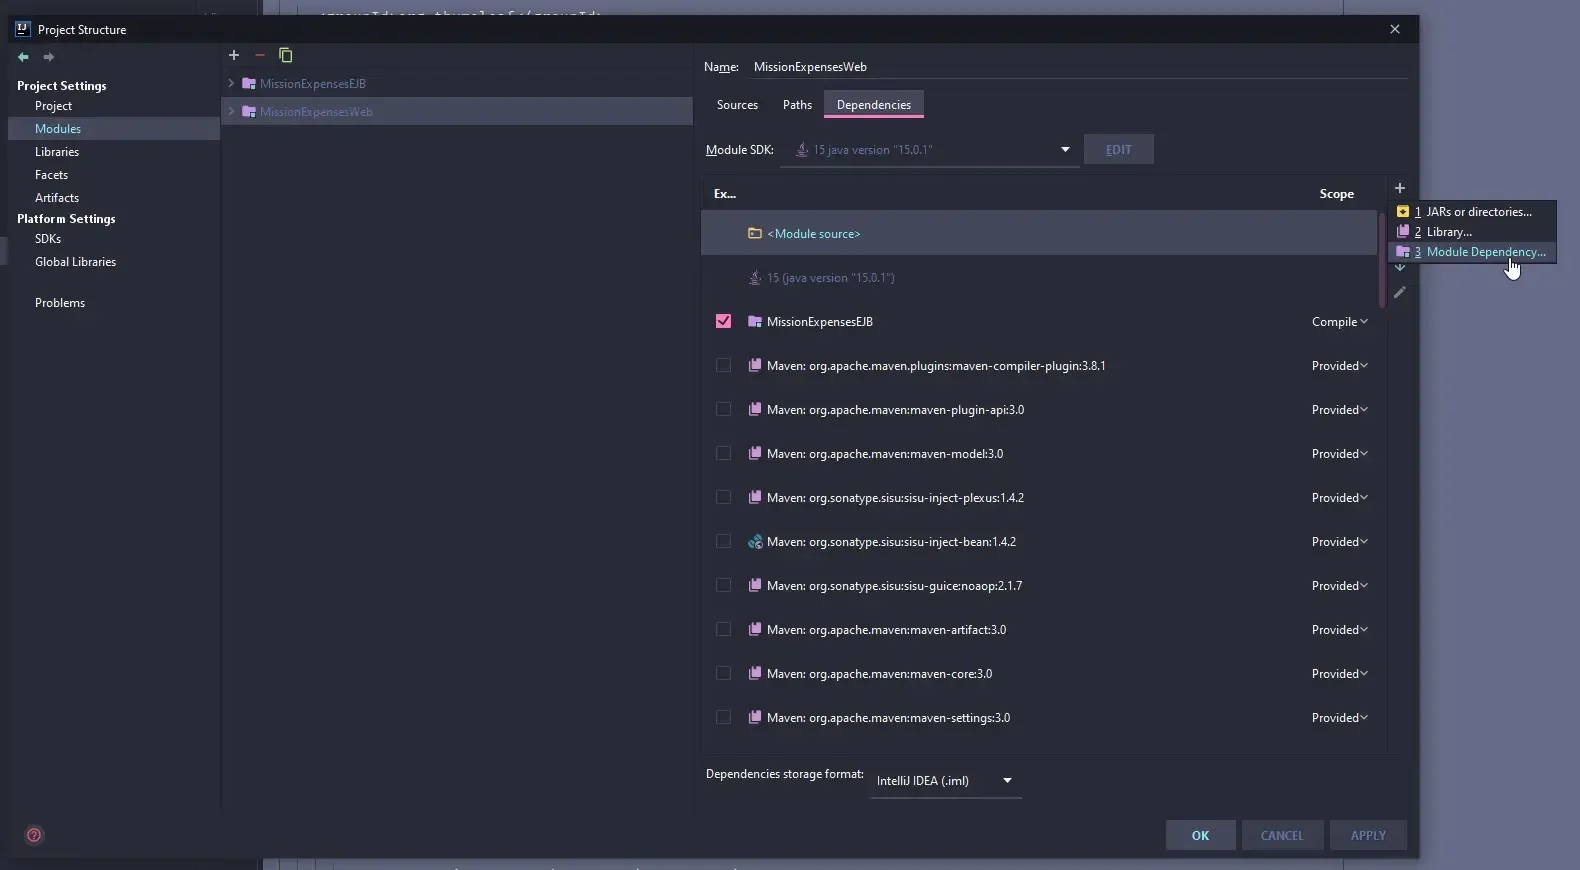
module with the + button, after that select the module that depends from the one just imported,
add the module dependency and enable it.
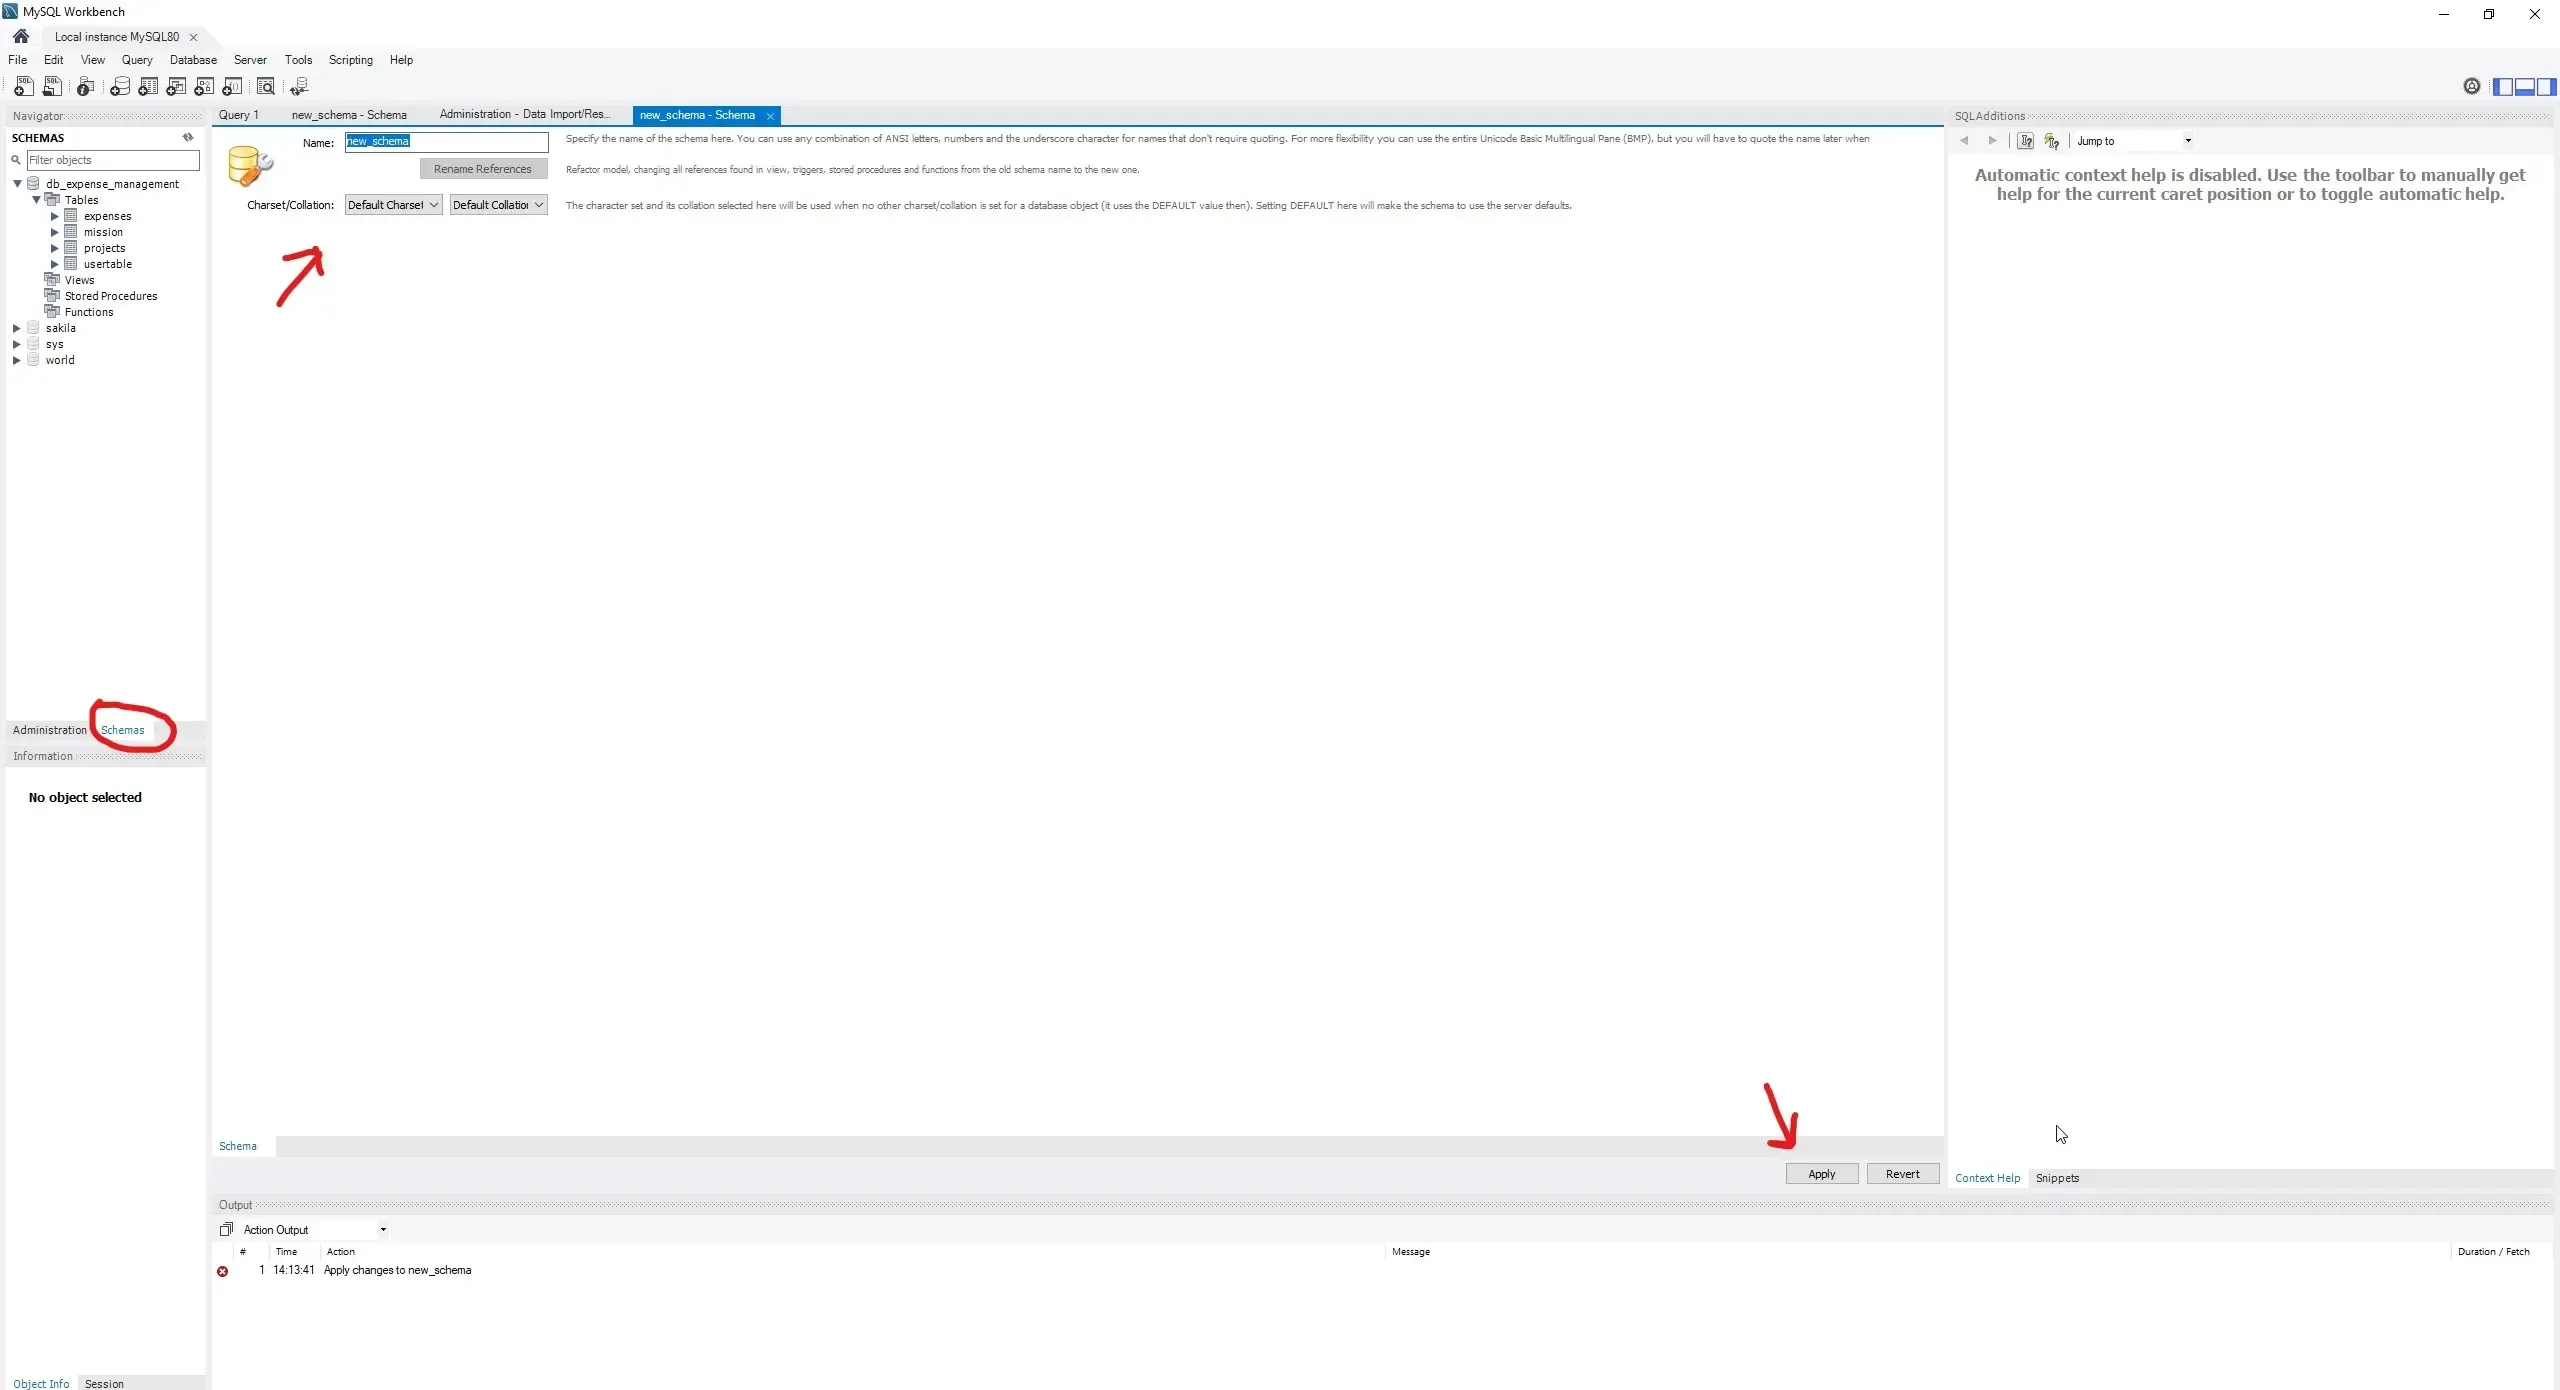
Setup schema or Import Dump MySQL
Open MySQL Workbench, click on the Schemas tab, right click Create Schema ..., name it and
apply.
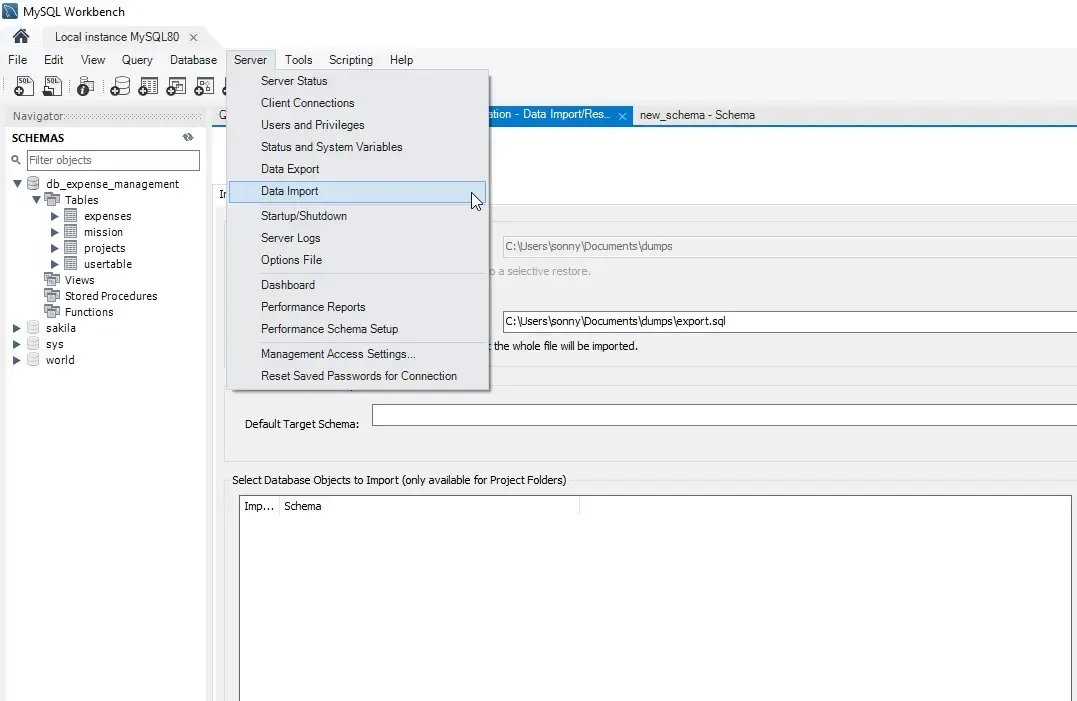
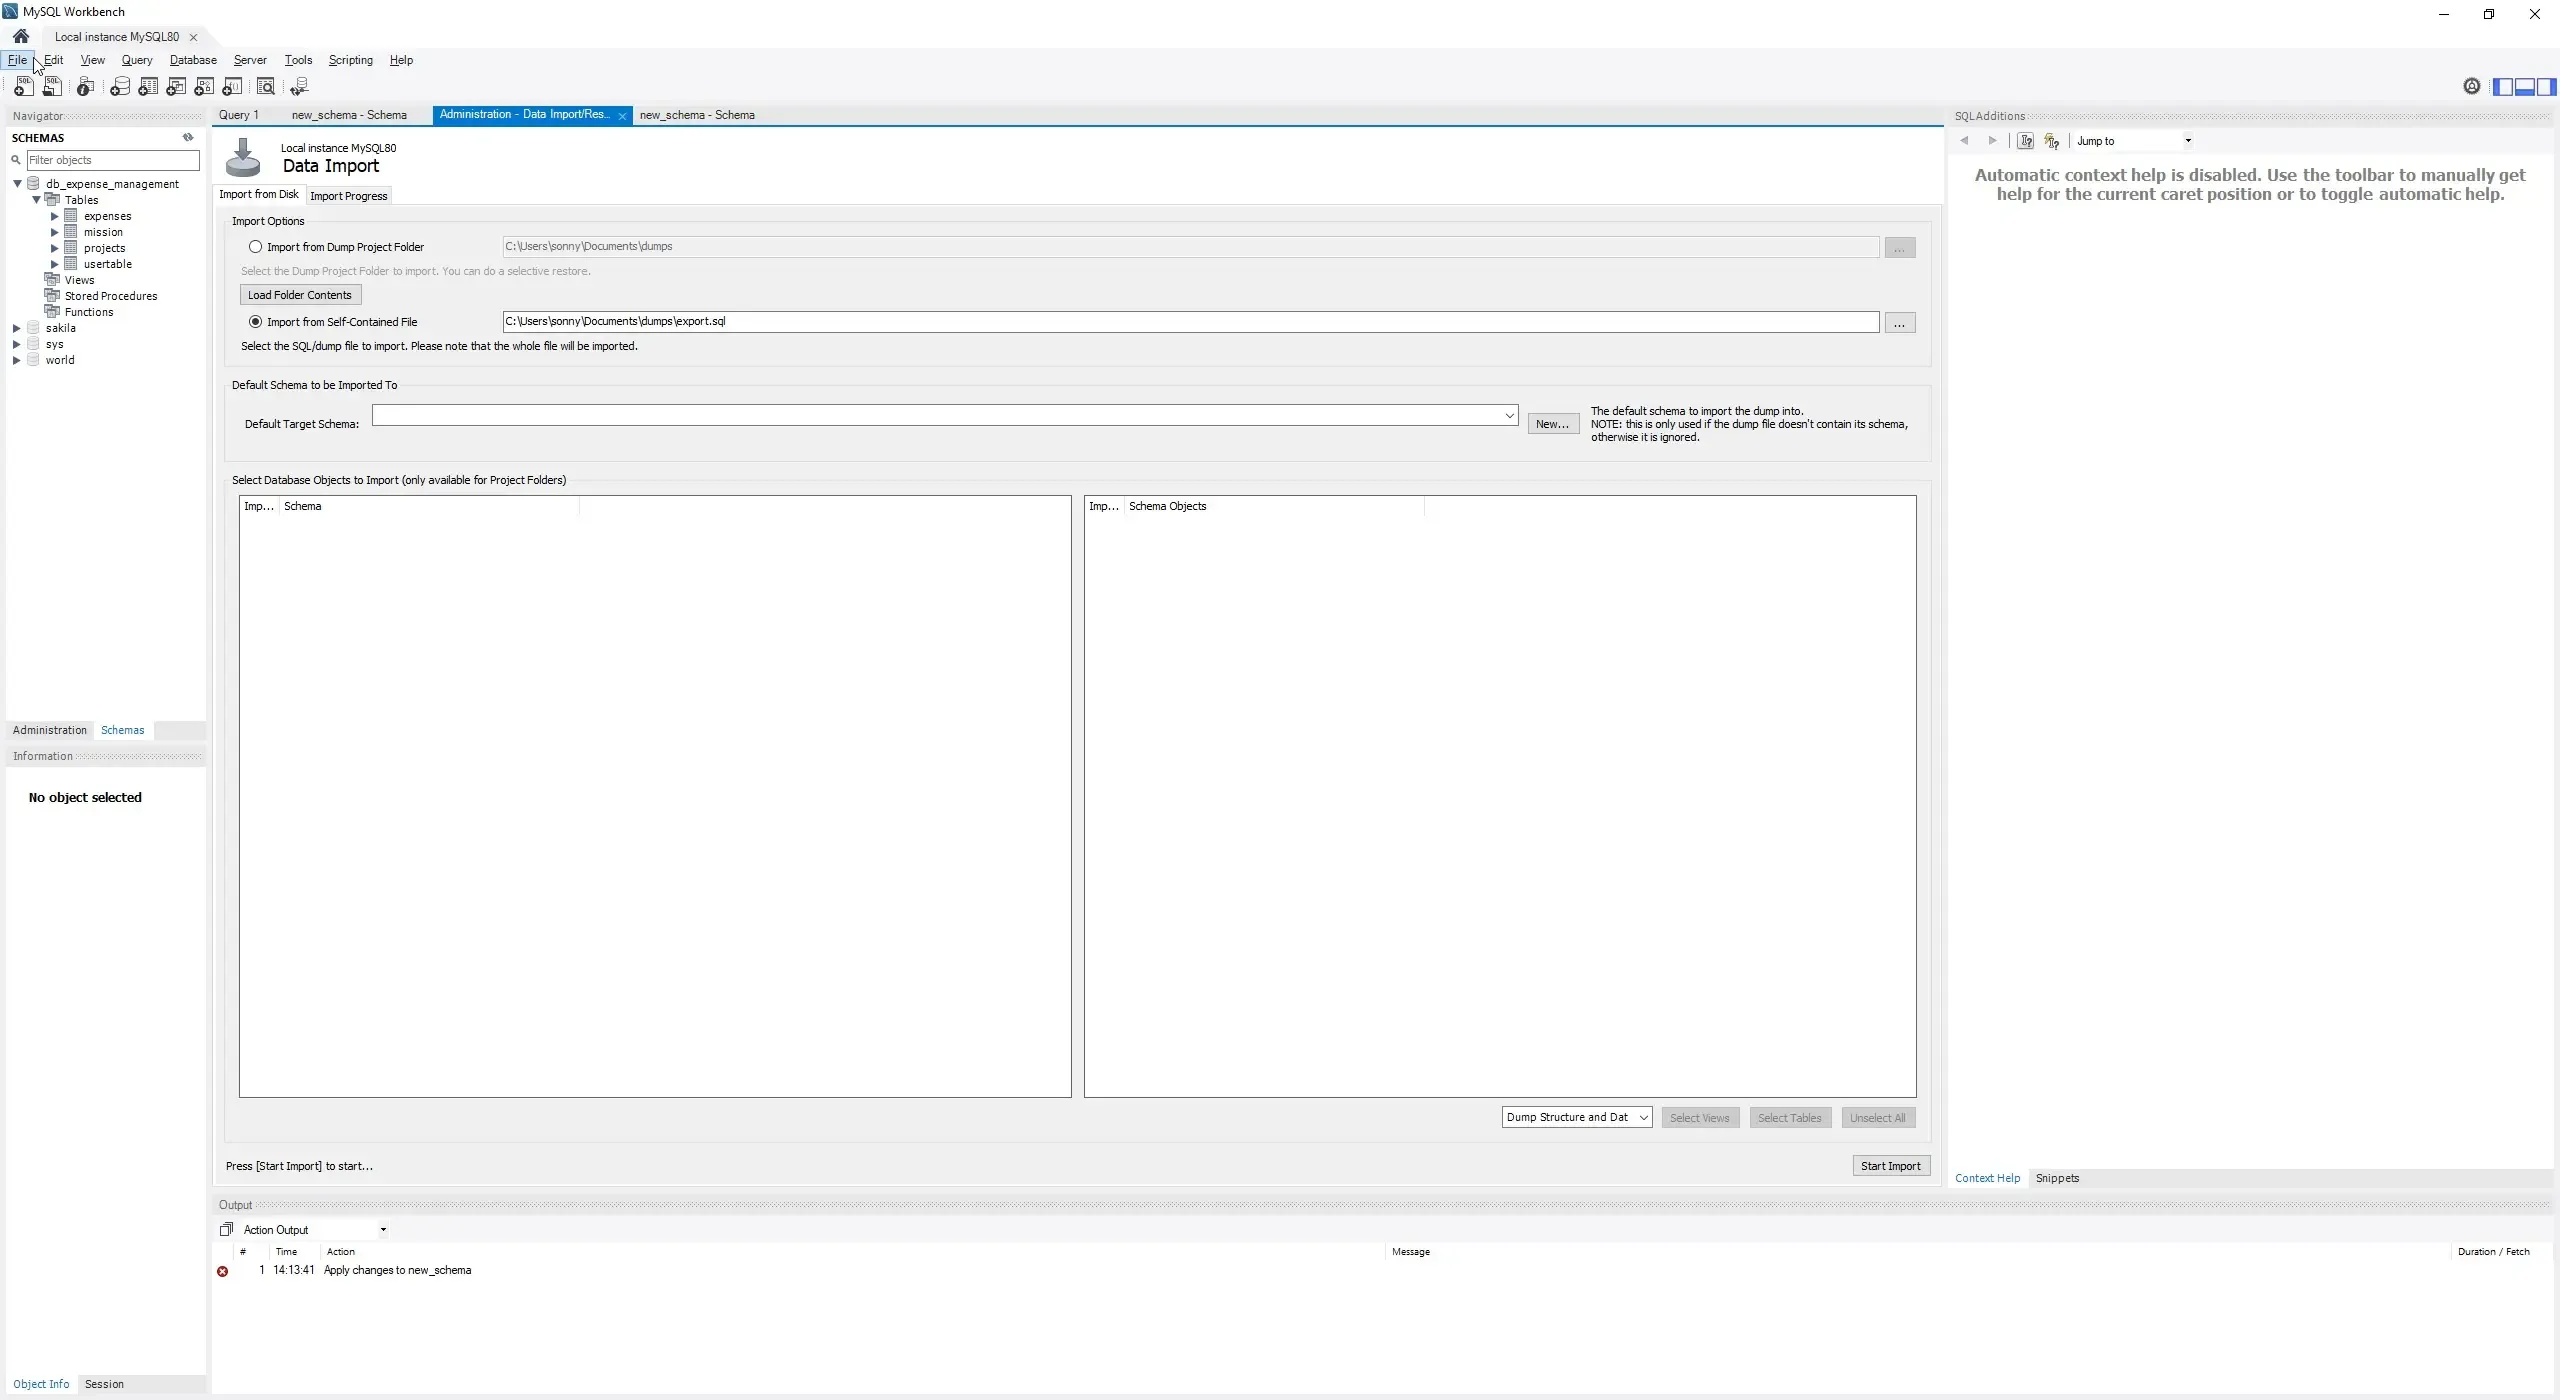
If you want to import a dump, go to Server>Database Import,
select Import from Self-Contained File, select the dump and click on Start import.
Your database url will be something like: jdbc:mysql://localhost:3306/db-name.
Setup Web Descriptor
Go to File>Project Structure>Facets, click on +>Web, choose a name, select + and
choose web.xml.
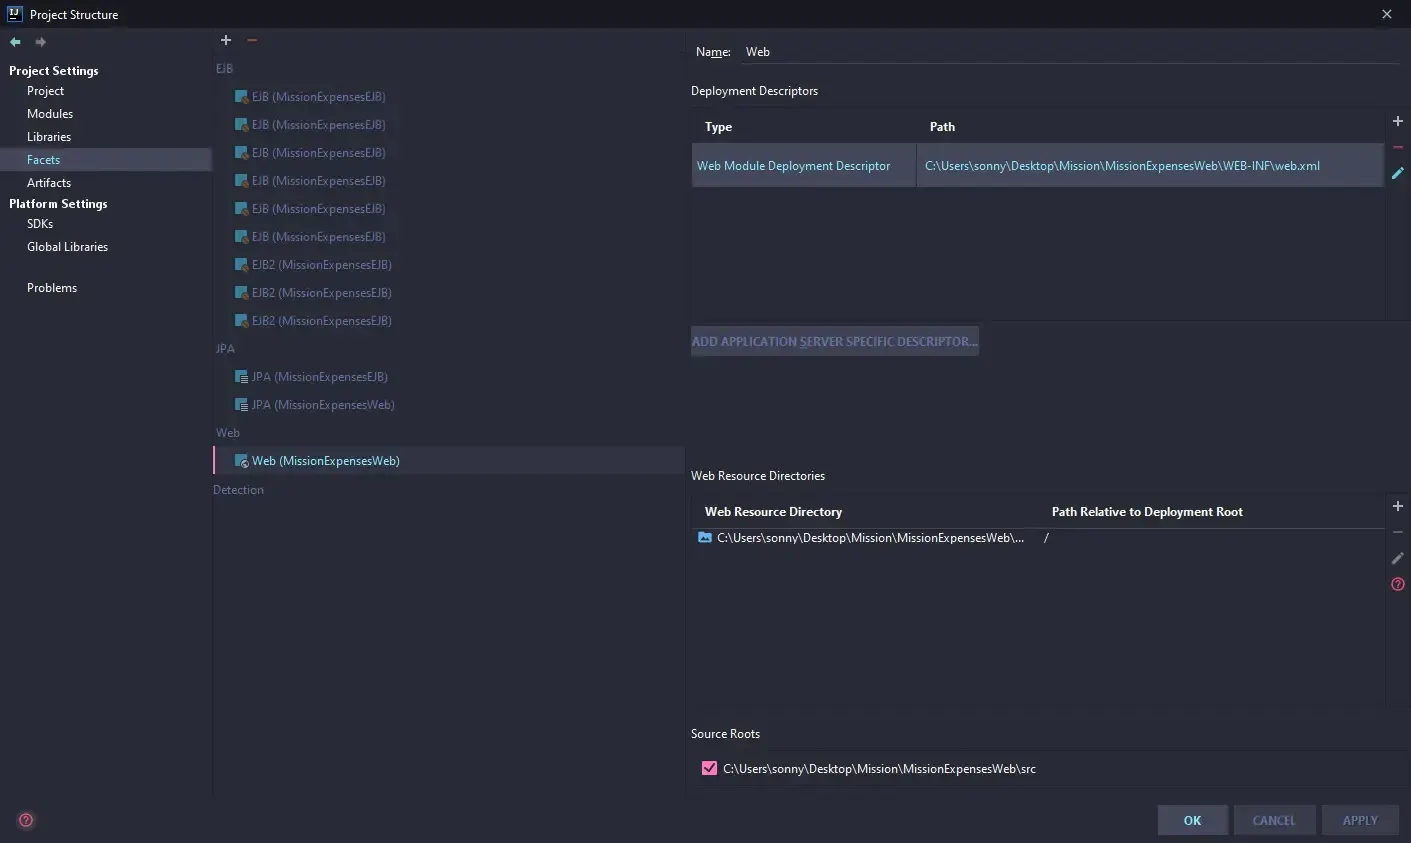
This will create the descriptor under [project-name]/WEB-INF/WEB.XML.
For Tomcat in the web.xml setup database username/password and the database url found in the
previous step like this example:
<?xml version="1.0" encoding="UTF-8"?>
  <web>
    <Resource id="myDatabase" type="DataSource">
        JdbcDriver com.mysql.cj.jdbc.Driver
        JdbcUrl jdbc:mysql://localhost:3306/db-name
        UserName root
        Password password
    </Resource>

    <Resource id="myDatabaseUnmanaged" type="DataSource">
        JdbcDriver com.mysql.cj.jdbc.Driver
        JdbcUrl jdbc:mysql://localhost:3306/db-name
        UserName root
        Password password
        JtaManaged false
    </Resource>

    <Resource id="MissionDB" type="DataSource">
        JdbcDriver com.mysql.cj.jdbc.Driver
        JdbcUrl jdbc:mysql://localhost:3306/db-name
        UserName root
        Password password
    </Resource>

    <Resource id="MissionDBUnmanaged" type="DataSource">
        JdbcDriver com.mysql.cj.jdbc.Driver
        JdbcUrl jdbc:mysql://localhost:3306/db-name
        UserName root
        Password password
        JtaManaged false
    </Resource>

</web>
For TomEE in the TomEE installation folder/conf/tomee.xml like this example:
<?xml version="1.0" encoding="UTF-8"?>
<tomee>
<Resource id="MySQL Database" type="DataSource">
# MySQL example
#
# This connector will not work until you download the driver at:
# http://www.mysql.com/downloads/api-jdbc-stable.html
JdbcDriver com.mysql.jdbc.Driver
JdbcUrl jdbc:mysql://endpoint:port
UserName username
Password password
</Resource>
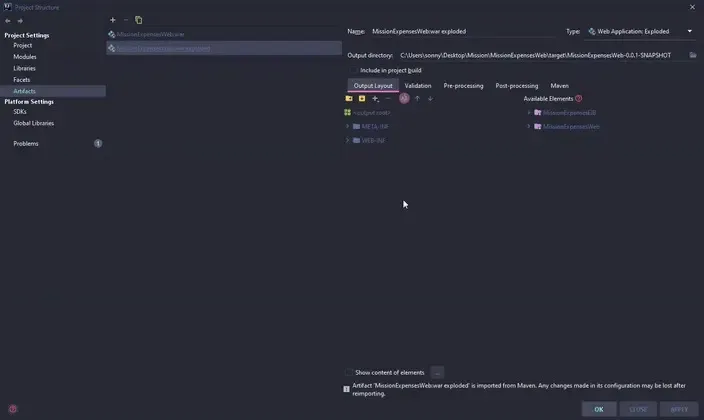
</tomee>Setup Artifacts
In order to run our server we need to modify previously added artifacts or newly imported one by
adding every Available Elements displayed on the right by double clicking, adding Compile Output
and Sources then click on Apply.
Convert Eclipse Project to IntelliJ Project
Open a project with Eclipse right click on Java Project and click Configure and you should
see Convert to Maven Project option.
This will generate a incomplete pom.xml that you need to fill with all the required dependencies.
